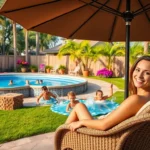
We’ve all dreamed of having that perfect outdoor space where we can relax and entertain guests, but the thought of expensive patio renovations often stops us in our tracks. The good news? Creating a stunning patio floor doesn’t have to drain your bank account or require professional installation.
Whether you’re working with concrete, dirt, or an existing surface that needs a major makeover, there are countless budget-friendly options that’ll transform your outdoor space into something truly special. From DIY concrete staining to creative use of pavers and natural materials, we’ve discovered many ways to achieve that high-end look without the hefty price tag.
Ready to turn your boring patio into an outdoor oasis? We’ll walk you through the most cost-effective flooring answers that deliver maximum impact for minimal investment, proving that style and savings can go hand in hand.
Concrete Pavers: Budget-Friendly Foundation Solutions
Concrete pavers offer an exceptional balance of affordability and style for outdoor spaces. We’ve found them to be one of the most cost-effective ways to transform your patio while maintaining long-term value.
DIY Installation Tips for Maximum Savings
Prepare your base properly by excavating 6-8 inches deep and creating a level foundation with sand and gravel. We recommend renting a plate compactor for $40-60 per day rather than purchasing one for better cost efficiency.
Start from one corner and work systematically across your patio space to maintain straight lines. You’ll save hundreds in labor costs by tackling this project yourself over a weekend.
Use a rubber mallet instead of a hammer to avoid cracking the pavers during installation. We suggest having extra pavers on hand since breakage can occur during the cutting process.
Cut pavers with a wet saw rental for clean edges around curves and borders. Most home improvement stores rent these tools for $35-50 per day.
Color and Pattern Options Within Budget
Gray concrete pavers start at just $0.50 per square foot and create a clean, modern appearance. We’ve seen dramatic transformations using basic gray pavers in herringbone or basketweave patterns.
Earth tone options like tan and rust add warmth without premium pricing, typically costing $0.75-1.25 per square foot. These colors complement natural landscaping elements and hide dirt effectively.
Mixing two complementary colors creates visual interest for under $2 per square foot total. We recommend using 70% of your base color and 30% accent color for balanced appeal.
Running bond patterns require no cutting and minimize waste, making them perfect for budget installations. Alternatively, herringbone patterns add sophistication with only 5-10% additional material needs.
Long-Term Durability Benefits
Concrete pavers withstand freeze-thaw cycles better than poured concrete, reducing replacement costs over time. We’ve observed 20-30 year lifespans with minimal maintenance required.
Individual paver replacement costs just $2-5 when damage occurs, unlike full slab reconstruction that can run thousands. This modularity makes concrete pavers incredibly cost-effective for long-term ownership.
Maintenance involves simple sweeping and occasional power washing, keeping annual upkeep under $50 for most patios. We recommend sealing every 3-5 years for enhanced protection and color retention.
Load bearing capacity exceeds most residential needs, supporting heavy outdoor furniture and equipment without cracking. This durability means your initial investment continues paying dividends for decades.
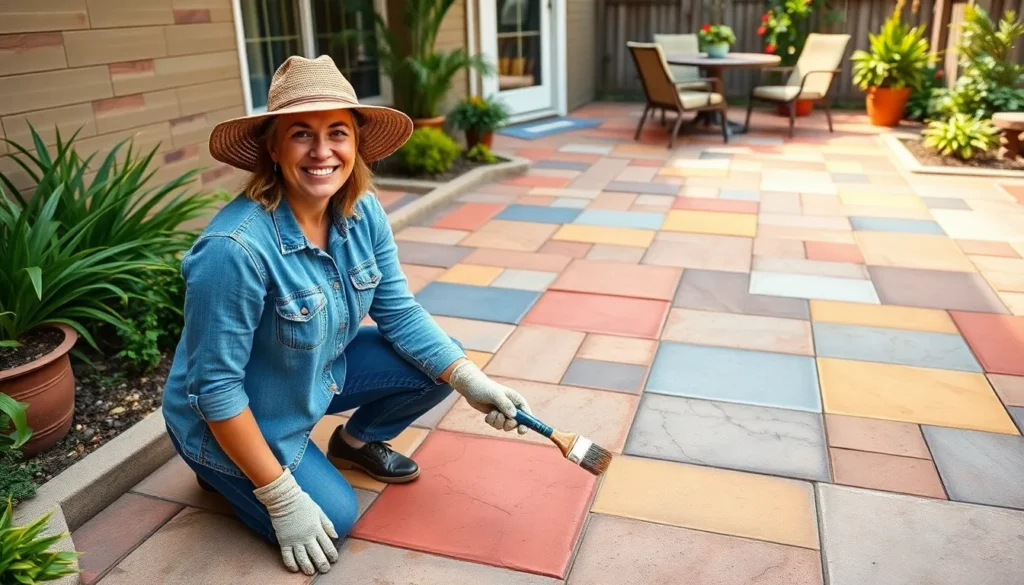
Painted Concrete: Transform Existing Surfaces for Less
 1")
Working with your existing concrete slab saves hundreds compared to installing new flooring materials. We’ll show you how to turn that plain concrete into a stunning patio floor using paint and creativity.
Surface Preparation Essentials
Cleaning your concrete thoroughly removes dirt, debris, grease, and mildew that prevent proper paint adhesion. Use a pressure washer or scrub with concrete cleaner to eliminate all surface contaminants.
Repairing cracks and holes creates the smooth surface you need for professional results. Fill damaged areas with concrete patching compound and allow it to cure completely before proceeding.
Etching sealed or very smooth concrete improves paint bonding significantly. Apply concrete etcher or muriatic acid following manufacturer instructions to create the texture paint needs to grip properly.
Priming with outdoor concrete primer ensures your paint job lasts for years. Choose primers designed specifically for exterior durability to enhance paint bonding and protect against weather damage.
Best Paint Types for Outdoor Use
Acrylic paints offer water resistance and easy application that makes them perfect for DIY projects. These water based formulas clean up easily and provide reliable protection against moisture.
Epoxy paints deliver the most durable finish available for high traffic areas. Their hard wearing surface resists weather damage and foot traffic better than any other paint type.
Concrete stains penetrate the surface to provide natural texture and permanent color. While not opaque like traditional paint, stains offer unique translucent effects that highlight concrete’s natural character.
Scuff resistant acrylic paint works exceptionally well for stenciled designs on patios. This specialized formula maintains its appearance even with regular foot traffic and outdoor exposure.
Always select paints labeled specifically for outdoor or concrete use to ensure they withstand UV rays, moisture, and temperature fluctuations.
Creative Design Ideas and Stencil Patterns
Solid color bases provide a fresh, clean foundation that instantly modernizes any patio space. Choose colors that complement your home’s exterior and outdoor furniture for a cohesive look.
Stenciled patterns replicate expensive patterned cement tiles at a fraction of the cost using water and scuff resistant acrylic paint. Geometric designs create sophisticated visual appeal while floral patterns add natural charm.
Two tone borders define patio edges and add professional finishing touches to your painted surface. Contrasting colors create visual interest and help separate different outdoor living areas.
Mixed material combinations blend painted concrete with reclaimed brick or decorative concrete blocks for added texture. This approach creates custom designs that look far more expensive than their actual cost.
| Paint Type | Cost Range | Durability | Best Use |
|---|---|---|---|
| Acrylic Paint | $25-40/gallon | 3-5 years | DIY projects |
| Epoxy Paint | $40-80/gallon | 7-10 years | High traffic areas |
| Concrete Stain | $30-50/gallon | 5-8 years | Natural textures |
| Specialty Acrylic | $35-60/gallon | 4-6 years | Stenciled designs |
Gravel and Stone: Natural Materials at Low Cost
 2")
Gravel patios deliver exceptional affordability while maintaining an environmentally friendly approach to outdoor flooring. We’ve found that gravel provides a permeable surface supporting natural rainwater drainage and eliminates the toxic chemicals often present in traditional paving materials.
Pea Gravel vs. Crushed Stone Options
Pea gravel consists of small, smooth, rounded stones measuring 1/8 to 3/8 inch in diameter. This material creates a comfortable walking surface with its gentle texture and offers versatility for combining with pavers or flagstones. We recommend pea gravel for homeowners seeking an informal, relaxed aesthetic that’s both widely available and budget friendly.
Crushed stone features angular shapes and variable sizing that provides superior durability for high traffic areas. Stone varieties offer natural, rugged appearances with excellent drainage properties and multiple color options for customization. We prefer crushed stone when creating elegant walkways and functional patios that require long term stability.
Proper Installation and Edging Techniques
Preparation begins with clearing and leveling your designated patio area to create a stable foundation. Weed barrier fabric installation prevents unwanted plant growth while maintaining the gravel’s appearance over time.
Base installation requires spreading and compacting larger crushed stone or gravel to establish structural stability. Top layer application involves evenly distributing your chosen pea gravel or crushed stone across the prepared surface.
Edging materials include metal, plastic, stone, wood, or concrete borders that contain gravel and prevent spreading into surrounding areas. Proper edging maintains your patio’s defined shape while significantly reducing ongoing maintenance requirements.
Maintenance Requirements and Costs
Routine maintenance involves occasional raking to level surfaces and redistribute gravel evenly across the patio area. Weed control requires periodic pulling or reapplying weed barrier fabric as vegetation attempts to establish itself.
Replenishment tasks include adding fresh gravel to areas where stones become sparse over time. Edging inspection and repairs ensure gravel remains properly contained within designated boundaries.
Cost advantages eliminate the need for sealing or resurfacing unlike concrete or pavers, making gravel patios exceptionally economical long term. We’ve observed that gravel patios require minimal financial investment for upkeep while delivering sustainable drainage answers.
Recycled Brick: Character-Rich Flooring on a Dime
 3")
Recycled bricks offer an unbeatable combination of affordability and vintage charm for patio flooring projects. These salvaged materials bring unique textures and weathered colors that create authentic rustic appeal without the premium price tag of new brick installations.
Where to Source Affordable Used Bricks
Salvage yards and architectural reuse stores serve as treasure troves for reclaimed bricks from demolition projects, typically offering materials at significantly reduced prices compared to retail options. Many of these specialty retailers price used bricks by the pallet or ton, making bulk purchases extremely cost effective.
Online marketplaces like Craigslist and Facebook Marketplace frequently feature homeowners selling leftover bricks from completed projects. We’ve found that searching these platforms regularly yields excellent deals, with some sellers offering free bricks just to clear their properties.
Construction site giveaways present another excellent sourcing opportunity when builders discard excess materials or demolition debris. Contractors often appreciate having someone remove unwanted bricks, so don’t hesitate to ask permission at active job sites in your area.
Demolition sales occur when entire buildings are torn down, creating opportunities to purchase materials by the ton or pallet. These events typically offer the best per-unit pricing for recycled bricks, especially when you’re planning larger patio installations.
Installation Methods for DIY Success
Preparation work begins with clearing and leveling your patio area completely, removing all vegetation and debris to create a stable foundation. Next, we recommend laying a base of compacted gravel followed by a leveling layer of sand to ensure proper drainage and stability.
Laying techniques involve arranging bricks in your chosen pattern, with herringbone, basket weave, and running bond being the most popular options for visual appeal. Use a rubber mallet to tap each brick firmly into position, ensuring they fit snugly together without gaps or uneven surfaces.
Gap filling requires sweeping sand or fine gravel between the bricks to lock them securely in place and prevent shifting over time. This step is crucial for maintaining the integrity of your recycled brick patio surface.
Edge restraints should be installed around the perimeter to prevent bricks from shifting outward, using materials like metal edging or concrete borders to maintain the patio’s shape permanently.
Weatherproofing and Sealing Considerations
Sealing applications protect recycled bricks from moisture penetration, stains, and gradual erosion using penetrating sealants specifically designed for brick surfaces. These treatments enhance durability while preserving the natural weathered appearance that makes recycled bricks so appealing.
Drainage planning ensures your brick base slopes slightly away from buildings to prevent water pooling and potential foundation damage. Proper water management extends the life of both your recycled brick surface and surrounding structures.
Maintenance schedules require removing weeds between bricks promptly and reapplying protective sealant every few years depending on local climate conditions and foot traffic patterns. This minimal upkeep keeps recycled brick patios looking fresh while maintaining their structural integrity over decades of use.
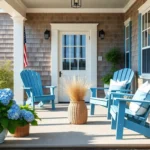
Outdoor Rugs: Instant Style Without Construction
 4")
Outdoor rugs offer the most immediate and affordable transformation for your patio flooring without any construction work. We can completely change the look and feel of our outdoor space in minutes with this simple addition.
Weather-Resistant Material Choices
Selecting the right materials ensures our outdoor rugs withstand sun, rain, and temperature changes. PVC and polypropylene rugs excel in outdoor environments because they resist moisture damage and UV fading. Weather-resistant acrylic fibers provide another excellent option that maintains color vibrancy through multiple seasons. Natural fiber rugs like jute should be avoided in uncovered areas since they absorb moisture and deteriorate quickly.
Drainage capabilities matter just as much as material composition. Flat weave rugs allow water to pass through easily, preventing puddles and mold growth underneath. Synthetic materials dry faster than natural fibers, making them ideal for areas that receive regular rainfall or sprinkler irrigation.
UV protection prevents fading and extends the life of our investment. Look for rugs specifically labeled as fade resistant or UV treated to maintain their appearance year after year. Solution-dyed fabrics offer superior color retention compared to surface-dyed alternatives.
Size and Placement Strategies
Proper sizing creates functional zones while maintaining visual balance on our patio. Choose rugs that extend at least 18 inches beyond furniture legs on all sides to create cohesive seating areas. Dining areas require rugs large enough for chairs to remain on the surface even when pulled out from the table.
Strategic placement defines different activity areas without permanent construction. Position rugs under seating arrangements to create intimate conversation zones or use them to separate dining areas from lounging spaces. Multiple smaller rugs work better than one large rug when we need to define several distinct areas.
Scale considerations prevent our rugs from looking lost or overwhelming. Small patios benefit from rugs that cover 60-70% of the available floor space, while larger patios can accommodate multiple rugs or one statement piece. Rectangular rugs complement most furniture arrangements, while round rugs work well with circular seating groups.
Seasonal Storage and Care Tips
Regular cleaning extends the lifespan of our outdoor rugs significantly. Vacuum or sweep rugs weekly to remove debris that can damage fibers over time. Spot clean spills immediately using mild soap and water to prevent permanent staining.
Proper storage during harsh weather protects our investment. Roll lightweight rugs and store them in dry locations during winter months or severe weather events. Modular tile rugs can be easily lifted and stacked for convenient storage in garages or sheds.
Protective measures keep rugs looking fresh throughout the season. Apply fabric protector sprays designed for outdoor use to create an additional barrier against stains and moisture. Rotate rugs periodically to ensure even wear patterns and prevent permanent furniture indentations.
Wood Pallets: Upcycled Flooring Solutions
 5")
Wood pallets transform discarded materials into rustic patio flooring that costs a fraction of traditional decking options. This eco-friendly approach lets us create custom layouts while supporting sustainability through material repurposing.
Safety Considerations for Pallet Selection
Choosing heat-treated (HT) pallets protects us from harmful chemicals that contaminate chemically treated alternatives. We should avoid pallets showing visible mold, excessive damage, or industrial chemical contamination that could pose health risks.
Hardwood pallets offer better durability in outdoor conditions compared to softwood varieties. Inspecting each pallet thoroughly helps us identify structural weaknesses or protruding nails that create safety hazards.
Marking systems on pallets indicate their treatment history, so we can confidently select materials that meet safety standards. Avoiding pallets from unknown sources reduces exposure to toxic substances that could leach into our outdoor living space.
Treatment and Preparation Steps
Sanding pallets extensively removes rough edges and splinters that could cause injury during installation or use. We need to clean each pallet with mild detergent and allow complete drying before applying protective treatments.
Wood preservatives designed for outdoor use protect against moisture damage, UV exposure, and pest infiltration. Applying these treatments extends the lifespan of our pallet flooring significantly.
Staining or painting adds visual appeal while providing additional protection against weather elements. We should choose products specifically formulated for exterior wood surfaces to ensure maximum durability.
Proper preparation creates a foundation for long-lasting pallet flooring that withstands seasonal weather changes. Each step in the treatment process contributes to the overall success of our budget-friendly patio transformation.
Assembly and Finishing Techniques
Laying weed barrier fabric beneath pallets suppresses unwanted vegetation while improving overall durability. We need to create a leveled and compacted base using gravel or sand for optimal stability.
Securing pallets together with screws or brackets creates a stable surface that handles foot traffic safely. Arranging pallets tightly eliminates gaps that could catch furniture legs or create tripping hazards.
| Assembly Component | Purpose | Cost Impact |
|---|---|---|
| Weed barrier fabric | Prevents weed growth | Minimal additional cost |
| Gravel/sand base | Provides level foundation | $2-4 per square foot |
| Screws/brackets | Secures pallet connection | $15-25 per patio |
| Filler strips | Closes gaps for smooth finish | $10-20 per project |
Adding filler strips between pallets creates a smoother walking surface and improves the overall appearance. We can use additional wood pieces to customize the final look according to our design preferences.
Applying a final waterproof sealant coat maximizes protection against rain and weather exposure. This finishing step ensures our pallet flooring investment lasts for years while maintaining its attractive appearance.
Interlocking Tiles: Easy Installation Floor Systems
 6")
Interlocking patio tiles deliver the perfect solution for homeowners seeking professional results without the hassle of traditional installation methods. These innovative flooring systems click together like puzzle pieces and can be installed directly over existing concrete or wood surfaces.
Composite vs. Natural Material Options
Composite decking tiles combine wood fibers with plastic to create a material that outperforms natural wood in durability and weather resistance. We’ve found that composite options resist rot, insects, and weather damage far better than their natural counterparts while requiring significantly less maintenance over time. These tiles often mimic the authentic look of wood but deliver superior longevity at a moderate price point.
Natural wood tiles offer traditional aesthetic appeal and typically cost less upfront than composite alternatives. But, natural materials require regular sealing or staining to maintain their appearance and structural integrity. Weather exposure causes fading and deterioration that increases long term maintenance costs even though the lower initial investment.
Retailers like IKEA offer composite deck tiles starting at approximately $16 to $30 per 9 square foot section, making them accessible for most patio renovation budgets.
Cost Comparison with Traditional Methods
Traditional concrete and stone pavers require substantial material and labor investments that often exceed budget friendly alternatives. Concrete pavers typically cost several dollars per square foot plus professional installation fees, creating expensive project totals for larger patio spaces.
Interlocking tiles provide exceptional value by balancing moderate pricing with simple installation requirements. IKEA’s deck tile systems cost around $16 to $30 per 9 square foot coverage, delivering professional appearance without custom stonework expenses.
Alternative materials like gravel and decomposed granite remain among the most economical choices at $10 to $75 per cubic yard. Vinyl flooring options cost approximately 70% less than stone or traditional tile installations while offering comparable visual appeal for budget conscious homeowners.
Temporary vs. Permanent Installation Benefits
Temporary installations using interlocking tiles offer unmatched flexibility for renters or homeowners planning future changes. These systems can be removed and relocated easily without leaving permanent damage to underlying surfaces. Minimal site preparation requirements make them ideal for seasonal outdoor flooring or DIY projects requiring quick results.
Permanent installations like concrete pavers and mortared stone require extensive groundwork including excavation, leveling, and professional grade materials. These methods provide superior stability and luxury appearance but demand higher costs and important labor investment. Permanent flooring answers offer long term durability benefits for homeowners committed to their outdoor space design.
Conclusion
We’ve shown you that creating a stunning patio doesn’t require a massive budget or professional installation. From concrete pavers starting at $0.50 per square foot to free recycled pallets these affordable options prove that style and savings can go hand in hand.
The key to success lies in choosing the right material for your exact needs and properly preparing your installation. Whether you prefer the durability of concrete pavers the natural charm of gravel or the instant transformation of outdoor rugs each option offers its own unique benefits.
Remember that many of these answers can be installed as DIY projects saving you even more money on labor costs. With proper maintenance these budget-friendly floors will serve you well for years to come giving you the outdoor space you’ve always wanted without very costly.
Frequently Asked Questions
What is the most affordable patio flooring option?
Concrete staining is one of the most cost-effective options, starting at around $2 per square foot. Gravel patios are also extremely budget-friendly, with pea gravel costing approximately $1-3 per square foot. These options provide excellent value while dramatically improving your outdoor space’s appearance without breaking the bank.
How much do concrete pavers cost per square foot?
Gray concrete pavers start at just $0.50 per square foot, making them an exceptional budget-friendly foundation solution. When you factor in their 20-30 year lifespan with minimal maintenance requirements, concrete pavers offer outstanding long-term value compared to other flooring options.
Can I paint my existing concrete patio?
Yes, painting existing concrete slabs is an excellent way to create a stunning patio floor at a fraction of new material costs. Proper surface preparation is essential, including cleaning and priming. Use outdoor-rated concrete paint for durability, and consider stenciled patterns for added visual interest.
Are gravel patios easy to maintain?
Gravel patios require minimal maintenance compared to concrete or pavers, making them economical long-term choices. Occasional raking to redistribute stones and adding fresh gravel every few years is typically all that’s needed. They’re also environmentally friendly, providing natural rainwater drainage through their permeable surface.
Where can I find recycled bricks for my patio?
Recycled bricks can be sourced from salvage yards, online marketplaces like Craigslist or Facebook Marketplace, and construction site giveaways. These character-rich materials are significantly more affordable than new bricks while adding unique charm and history to your patio space.
Do outdoor rugs work well for patios?
Outdoor rugs are an instant, affordable way to enhance patio aesthetics without construction. Choose weather-resistant materials like PVC or polypropylene for durability. Proper sizing and placement create functional zones and visual balance, while seasonal storage extends their lifespan significantly.
Are wood pallets safe for patio flooring?
Heat-treated pallets are safe for patio use, but avoid chemically treated ones. Always inspect pallets for mold, structural integrity, and look for “HT” stamps indicating heat treatment. Proper preparation including sanding, cleaning, and applying wood preservatives ensures durability and safety.
Can interlocking patio tiles be installed over existing surfaces?
Yes, interlocking patio tiles can be installed directly over existing concrete, wood, or other stable surfaces. This eliminates extensive groundwork and reduces installation costs. They’re perfect for renters or homeowners planning future changes since they’re easily removable and repositionable.
What’s the difference between pea gravel and crushed stone?
Pea gravel offers a smooth, rounded texture perfect for relaxed aesthetics and is comfortable underfoot. Crushed stone provides superior durability in high-traffic areas due to its angular edges that lock together. Choose based on your patio’s intended use and desired appearance.
How long do DIY patio flooring options typically last?
Concrete pavers last 20-30 years, painted concrete needs refreshing every 3-5 years, gravel patios last indefinitely with minimal topping, and properly treated wood pallets can last 5-10 years. Regular maintenance extends the lifespan of all options significantly.