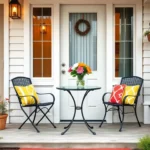

We’ve all stood on a porch and wished the ceiling looked more inviting. That bare overhead space can make even the most charming outdoor area feel unfinished and uninspiring. The good news? You don’t need to expensive to transform your porch ceiling into a stunning focal point.
Whether you’re dealing with a covered front porch or a cozy back deck, we’ve discovered dozens of budget-friendly answers that’ll make your neighbors stop and stare. From simple paint techniques that cost under $50 to creative DIY installations using everyday materials, there’s a perfect ceiling makeover waiting for every budget.
We’re about to share our favorite low-cost porch ceiling ideas that deliver maximum impact without the hefty price tag. These proven techniques will help you create an outdoor space that feels like a true extension of your home while keeping your wallet happy.
Paint Your Existing Ceiling for an Instant Refresh
Painting your porch ceiling offers the most cost-effective transformation you’ll find for outdoor spaces. We’ve discovered that this simple update can completely change your porch’s atmosphere while staying well within a tight budget.
Choose Light Colors to Make the Space Feel Larger
Light colored paints create the illusion of height and openness on your porch ceiling. We recommend selecting whites, creams, or pale grays to maximize the visual expansion of your outdoor space. Bright colors reflect natural light better than darker shades, making covered porches feel less enclosed and more welcoming.
Neutral tones like soft beige or warm white work particularly well for traditional home styles. Off white shades complement most exterior color schemes without clashing with your home’s existing palette. Light blues and pale greens also provide subtle color while maintaining that spacious feeling.
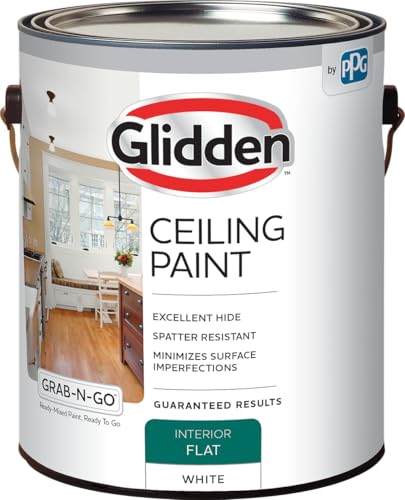
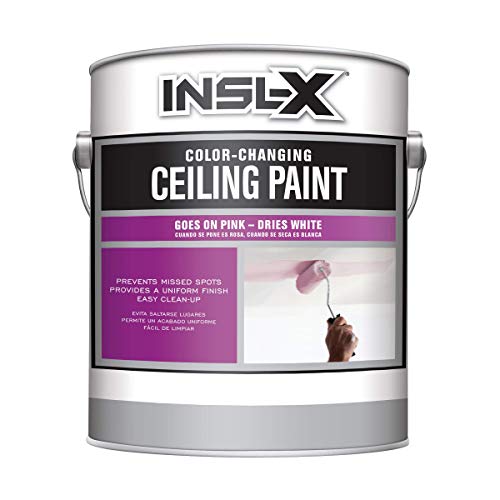
Use Porch and Floor Paint for Durability
Porch and floor paints withstand outdoor conditions far better than standard interior paints. We always choose these specialized formulations because they resist moisture, temperature changes, and UV damage that can quickly ruin regular wall paint on outdoor ceilings.
Exterior latex paints designed for porches typically cost $30 to $50 per gallon and cover approximately 350 square feet. These paints contain additives that prevent mildew growth and resist fading from sun exposure. Semi gloss or satin finishes work best for porch ceilings since they’re easier to clean and more resistant to weather damage than flat paints.
| Paint Type | Coverage | Cost Range | Durability |
|---|---|---|---|
| Porch & Floor Paint | 350 sq ft/gallon | $30-$50 | 7-10 years |
| Standard Exterior Paint | 400 sq ft/gallon | $25-$40 | 5-7 years |
| Premium Exterior Paint | 375 sq ft/gallon | $45-$70 | 10-15 years |
Consider Haint Blue for Traditional Southern Charm
Haint blue creates an authentic Southern porch aesthetic that’s both beautiful and historically important. We love this pale blue green color because it adds character while maintaining the light, airy feeling that makes porches so inviting.
Traditional haint blue was believed to repel insects and evil spirits, making it a popular choice for porch ceilings throughout the South. Modern versions of this classic color include Benjamin Moore’s Palladian Blue and Sherwin Williams’ Watery. These shades complement white trim beautifully and work especially well on farmhouse, colonial, and coastal style homes.
The soft blue tone mimics the sky, creating visual continuity between your covered porch and the open outdoors. Haint blue also photographs beautifully, making your porch more photogenic for social media or real estate purposes.


Install Affordable Beadboard Panels
 1")
Beadboard panels offer a classic and budget-friendly solution for transforming your porch ceiling into an eye-catching focal point. This traditional material, originally designed for wainscoting, brings texture and charm to outdoor spaces while remaining surprisingly affordable for DIY enthusiasts.
Purchase Pre-Made Panels from Home Improvement Stores
Pre-made beadboard panels from major home improvement retailers deliver convenience and cost savings for your porch ceiling project. These ready-to-install panels eliminate the need for custom fabrication while providing a uniform, professional appearance. You can easily attach them to existing ceiling structures using construction adhesive or staples, minimizing both labor costs and installation time.
Most home improvement stores stock water-resistant PVC beadboard panels specifically designed for outdoor applications. These panels resist moisture damage and won’t warp or rot like traditional wood options. Shopping at these retailers also gives you access to bulk pricing and seasonal sales that can further reduce your project costs.
Use MDF Beadboard for Budget-Friendly Options
Medium-Density Fiberboard (MDF) beadboard represents one of the most economical material choices for porch ceiling upgrades. These panels typically cost significantly less than solid wood or PVC alternatives while still providing an excellent surface for finishing. MDF beadboard cuts cleanly and installs easily, making it perfect for weekend DIY projects.
Proper sealing becomes crucial when using MDF beadboard in outdoor environments. We recommend applying high-quality primer and exterior-grade paint to prevent moisture penetration and extend the material’s lifespan. This additional step protects your investment while maintaining the budget-friendly nature of the project.
Paint or Stain to Match Your Porch Style
Painting or staining your beadboard ceiling creates endless customization possibilities at minimal cost. Traditional “haint blue” paint offers a charming Southern aesthetic that complements most home styles while maintaining the light, airy feel established by your base ceiling color. This historic color choice adds character and regional charm to your outdoor space.
Staining provides another attractive option that highlights the natural wood grain pattern of beadboard panels. Light oak or weathered gray stains create a rustic, cabin-like atmosphere that works particularly well with farmhouse and cottage-style homes. Both painting and staining allow you to coordinate your porch ceiling with existing trim, furniture, and architectural elements throughout your outdoor living area.
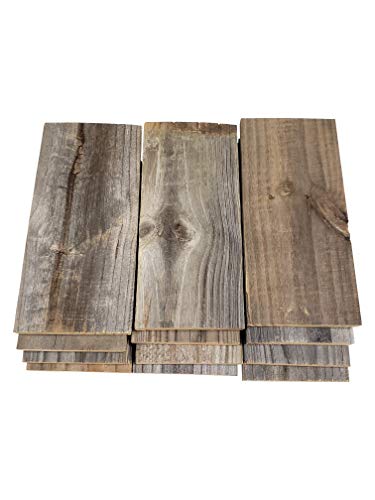
Add Reclaimed Wood Planks for Rustic Appeal
 2")
Building on our paint and beadboard answers, we’ll explore how reclaimed wood planks transform ordinary porch ceilings into stunning rustic focal points. These weathered materials bring character and warmth that new lumber simply can’t match.
Source Free Wood from Pallets or Old Barns
Pallet wood offers the most budget-friendly path to achieving a high-end reclaimed look without the premium price tag. We’ve found that shipping pallets from local businesses, construction sites, and warehouses provide excellent ceiling material after proper preparation. Sanding removes rough edges and splinters while preserving the wood’s natural character marks and weathering patterns.
Old barn wood represents another treasure trove of authentic reclaimed lumber that costs significantly less than retail alternatives. Salvage yards, farm auctions, and rural property listings frequently feature barn wood at fraction of new lumber prices. These aged planks showcase decades of natural weathering that creates unique textures, color variations, and grain patterns impossible to replicate with manufactured materials.
Use Tongue and Groove Pine Boards
Tongue and groove pine boards deliver the appearance of expensive reclaimed wood while maintaining budget consciousness and installation simplicity. These interlocking planks create seamless ceiling surfaces without visible gaps or joints that might collect debris or moisture. Pine’s lightweight nature reduces structural stress on porch frameworks compared to heavier hardwood alternatives.
Installation becomes straightforward since tongue and groove boards snap together without complex measuring or cutting requirements. We recommend starting from one corner and working systematically across the ceiling to maintain consistent alignment. Pine’s natural resin content provides inherent moisture resistance that helps protect against outdoor elements.
Apply Wood Stain for Rich, Natural Tones
Wood stain enhances reclaimed lumber’s natural beauty while providing essential protection against UV damage and moisture penetration. Penetrating stains soak deep into wood fibers rather than sitting on the surface like paint, allowing the natural grain patterns and character marks to remain visible. This technique costs significantly less than premium paints while delivering superior aesthetic results.
We’ve discovered that gel stains work particularly well on reclaimed wood because they don’t require perfectly smooth surfaces to achieve even coverage. Dark walnut and weathered gray stains complement most home exteriors while highlighting the rustic appeal of salvaged materials. Semi-transparent stains allow wood’s natural character to show through while providing weather protection that extends ceiling lifespan.


Create a Coffered Ceiling Look with Molding
 3")
Building on our previous budget-friendly approaches, we can achieve an elegant coffered ceiling appearance using simple framing and molding techniques. This method delivers the sophisticated look of expensive coffered panels without the custom construction costs.
Use Basic Lumber to Frame Rectangular Sections
Basic lumber becomes our foundation for creating the grid-like pattern that defines coffered ceilings. We start by measuring our porch ceiling and planning rectangular sections that will mimic the appearance of traditional coffered panels. Pine or common pine lumber works perfectly for this project since these materials are readily available at hardware stores and lumber yards.
Frame each rectangular section by attaching lumber strips directly to the existing ceiling surface. We recommend spacing these sections evenly across the ceiling to create a balanced, professional appearance. This approach transforms a plain ceiling into an architecturally interesting focal point using inexpensive materials that most DIY enthusiasts can handle.
Add Simple Crown Molding for Definition
Simple crown molding elevates our basic lumber frame into something that truly resembles expensive coffered work. We install ready-made molding pieces around each framed rectangular section to enhance definition and add architectural interest affordably. These molding pieces are easily found at hardware stores alongside our lumber materials.
Crown molding creates depth and shadow lines that make each coffered section appear more prominent and sophisticated. We attach the molding carefully to ensure clean corners and consistent spacing throughout the entire ceiling installation. This step transforms our simple lumber frame into a convincing coffered ceiling design.
Paint Everything in Coordinating Colors
Paint unifies our entire coffered ceiling design while providing the contrast needed to highlight each section. We recommend using a subtle, light shade for the main ceiling areas with white or a complementary color for the molding to create visual definition. Popular porch ceiling colors include “haint blue,” a traditional Southern shade that complements coastal or farmhouse styles perfectly.
Outdoor-grade paint becomes critical for this project since porch ceilings face constant exposure to moisture and sun. We apply this specialized paint to both the lumber frame and crown molding to ensure our coffered ceiling withstands weather conditions while maintaining its attractive appearance. Coordinating colors throughout the design creates a polished, professional result that rivals expensive custom coffered installations.
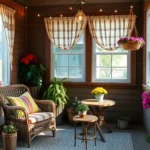
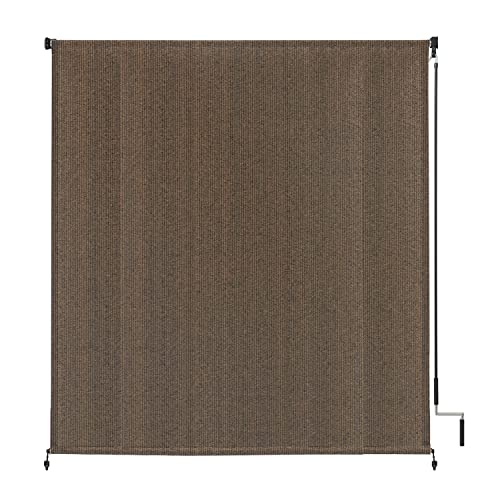
Hang Outdoor Fabric or Drop Cloths
 4")
Hanging fabric or canvas drop cloths offers one of the most budget-friendly ways to transform your porch ceiling into a soft, textured focal point. This approach provides immediate visual impact while keeping costs minimal.
Attach Canvas Drop Cloths with Staples or Nails
Canvas drop cloths from paint stores typically cost under $20 and provide excellent coverage for most porch ceiling areas. We recommend attaching these directly to ceiling joists or framing using heavy-duty staples spaced every 12 inches for secure installation. Industrial-grade staple guns work best for penetrating the canvas material and gripping wooden surfaces effectively.
Galvanized nails offer another reliable attachment method, particularly for heavier fabric materials that might pull away from staples over time. Place nails along the perimeter first, then work toward the center to prevent sagging or bunching. Construction adhesive applied along the edges adds extra holding power in high-wind areas.
Pre-drilling small pilot holes prevents splitting when working with older ceiling boards. This preparation step ensures clean installation and reduces the risk of damaging existing porch structures.
Use Outdoor Fabric for Weather Resistance
Outdoor fabric specifically designed for awnings or marine use withstands moisture, UV rays, and temperature fluctuations better than standard canvas materials. Acrylic outdoor fabrics resist fading for 5-7 years compared to 1-2 years for untreated canvas drop cloths. These specialized materials also shed water more effectively, preventing mold and mildew growth.
Solution-dyed acrylic fabrics maintain their color integrity even after prolonged sun exposure. We’ve found these materials particularly effective in southern climates where intense UV radiation quickly degrades standard fabrics. Marine-grade canvas offers superior durability but costs approximately 30% more than basic outdoor fabric options.
Polyester outdoor fabrics provide another weather-resistant choice at moderate prices. These materials stretch less than canvas, creating tighter installation with fewer wrinkles or sags over time.
Create Patterns with Different Colored Sections
Alternating fabric colors in stripes or geometric patterns adds visual interest without increasing material costs significantly. We suggest using two complementary colors in equal sections to create a balanced, sophisticated appearance. Warm colors like terracotta and cream work well for cozy evening spaces, while cool blues and whites enhance daytime relaxation areas.
Diagonal installations create ever-changing movement across the ceiling plane. Start from one corner and work toward the opposite corner, securing each fabric section before adding the next. This technique requires careful measuring but produces striking results that rival expensive custom installations.
Mixing different fabric textures within the same color family adds depth without overwhelming the space. Combine smooth outdoor canvas with textured burlap or linen-look materials for subtle variation. This approach costs roughly the same as single-fabric installations while delivering more sophisticated visual appeal.

Install Vinyl Beadboard for Low Maintenance
 5")
We’ve explored fabric answers and rustic wood options, but vinyl beadboard offers the perfect balance of classic charm and practical benefits for budget-conscious homeowners. This material delivers the timeless appeal of traditional beadboard while eliminating the ongoing maintenance requirements that come with wood installations.
Choose Vinyl That Mimics Real Wood
Modern vinyl beadboard manufacturers have perfected the art of replicating authentic wood textures and grain patterns. We can achieve an elegant aesthetic that closely resembles real wood without the associated costs of premium lumber. Today’s vinyl panels feature sophisticated embossing techniques that create realistic wood grain details, making it nearly impossible to distinguish from genuine beadboard at first peek.
Available patterns range from traditional narrow plank styles to wider board configurations, allowing us to match various architectural styles from colonial to contemporary. The manufacturing process creates deep grooves and raised panels that cast natural shadows, improving the three-dimensional appearance that makes beadboard so visually appealing.
Benefit from Easy Cleaning and Durability
Vinyl beadboard resists moisture completely, preventing the warping, cracking, and peeling issues that plague wood installations in humid porch environments. We can maintain these ceilings with simple soap and water cleaning, requiring only occasional washing to keep them looking fresh and new.
Unlike wood alternatives, vinyl doesn’t absorb water or develop mold growth, making it particularly suitable for covered porches exposed to rain and humidity. The material won’t crack under temperature fluctuations or require periodic sanding, staining, or sealing treatments that wood beadboard demands.
Durability translates directly into long-term cost savings since we won’t face replacement or major maintenance expenses for years. The material maintains its appearance and structural integrity through multiple seasons without degradation.
Select from Various Colors and Finishes
Vinyl beadboard panels come in an extensive array of colors and finishes, giving us the flexibility to customize our porch ceiling to complement existing exterior elements. White remains the most popular choice for its clean, classic appearance, but we can also find cream, beige, and even wood-tone options that enhance different design themes.
The material accepts paint well if we decide to update the color scheme in the future, providing long-term versatility for evolving design preferences. Finish options include smooth surfaces for contemporary looks or textured varieties that enhance the wood-like appearance.
We can coordinate vinyl beadboard colors with our home’s trim, siding, or outdoor furniture to create a cohesive design scheme that ties the entire porch area together seamlessly.
Apply Textured Paint Techniques
 6")
Textured paint techniques offer an affordable way to transform your porch ceiling while adding depth and visual interest to the space. We can achieve dramatic results using simple tools and materials from any home improvement store.
Use Sponge Painting for Subtle Texture
Sponge painting creates natural-looking texture that mimics weathered or marbleized finishes without requiring expensive materials or advanced skills. We start by applying a base coat to our porch ceiling, then load a clean sponge with contrasting paint and gently dab it across the surface. This technique works particularly well for beginners since we can easily control the amount of texture by adjusting our dabbing pressure and spacing.
Natural sea sponges produce the most authentic results, though synthetic sponges from create stores work well for tighter budgets. We recommend using two complementary colors to create depth, such as a light base with darker accent tones. The dabbing motion should vary in direction and intensity to avoid creating repetitive patterns that look artificial.
Try Rag Rolling for Vintage Appeal
Rag rolling delivers a vintage or aged effect that adds character to plain porch ceilings while masking minor imperfections in the surface. We begin with a base coat, then mix a glaze or secondary color that complements our chosen palette. A crumpled cotton rag soaked in this mixture gets rolled across the base coat to create soft, blended patterns.
This technique requires working in small sections while the glaze remains workable, typically covering 3-4 square feet at a time. We can adjust the intensity by changing how much glaze we apply to the rag or by varying our rolling pressure. Cheese cloth, old t-shirts, or paper towels all work as alternatives to traditional rags, each creating slightly different texture patterns.
Add Stencils for Decorative Patterns
Stenciled ceilings provide endless customization options at minimal cost, allowing us to create anything from traditional medallions to modern geometric designs. We apply our base coat first, then position pre-made or homemade stencils across the ceiling surface. A stencil brush loaded with contrasting paint gets dabbed through the openings to create crisp, defined patterns.
Create stores offer hundreds of stencil options for under $10 each, or we can create custom designs using cardboard or plastic sheets. We secure each stencil with painter’s tape to prevent shifting, then use light, dabbing motions rather than brushing to avoid paint bleeding under the edges. Multiple colors can layer together for complex designs, with each color needing to dry completely before applying the next stencil layer.


Repurpose Old Shutters or Doors
 7")
We’ve discovered one of the most creative and budget-friendly approaches to transforming your porch ceiling involves giving new life to forgotten architectural elements. Repurposing vintage shutters and salvaged doors creates stunning ceiling treatments that add character while keeping costs remarkably low.
Mount Vintage Shutters as Ceiling Panels
Vintage shutters offer an exceptional way to create textured ceiling panels that bring rustic charm to your porch space. We can source these gems from thrift stores, salvage yards, and leftover materials from renovation projects at incredibly affordable prices. Their natural slatted design adds visual depth while allowing air circulation, making them perfect for screened porches where ventilation matters.
Installing shutters requires mounting them directly onto your existing ceiling structure using appropriate hardware. We recommend securing each panel with screws driven into ceiling joists for maximum stability. The beauty of shutters lies in their ready-made decorative appeal, eliminating the need for additional trim work or complex installation techniques.
Use Salvaged Doors for Unique Character
Salvaged doors present an extraordinary opportunity to create one-of-a-kind ceiling panels with distinctive architectural character. We particularly love doors with paneled or decorative features that add dimensional interest to otherwise flat ceiling surfaces. Old solid wood doors provide excellent durability and weather resistance once properly sealed, making them ideal for outdoor porch applications.
Cutting doors to fit your ceiling dimensions allows for creative arrangements and unique design possibilities. We suggest measuring your ceiling space carefully and planning the layout before making any cuts. This approach delivers a statement ceiling at minimal cost while recycling materials that might otherwise end up in landfills.
Sand and Paint for a Fresh Look
Preparing your repurposed shutters or doors ensures they’ll look fresh and last for years on your porch ceiling. We always start by sanding all surfaces to remove old paint, smooth rough edges, and create a clean foundation for new finishes. This step is crucial for achieving professional-looking results that complement your porch’s overall design.
Exterior-grade paint protects your newly installed ceiling from weather damage while allowing complete color customization. We recommend lighter paint colors to make porch spaces feel larger and brighter, though bold hues can add personality and create dramatic focal points. Proper preparation and quality paint transform worn architectural salvage into stunning ceiling features that rival expensive custom installations.
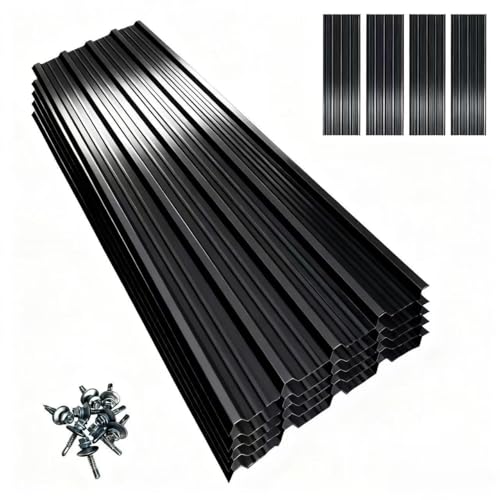
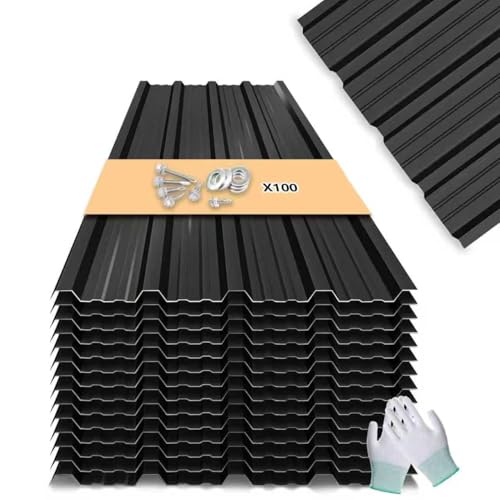
Install Corrugated Metal Panels
 8")
Corrugated metal panels offer one of the most budget-friendly answers for transforming your porch ceiling while delivering exceptional durability. These panels resist moisture, rot, and pests better than traditional materials, making them ideal for outdoor applications where longevity matters most.
Choose Galvanized Steel for Industrial Style
Galvanized steel panels create a striking industrial aesthetic that complements modern and contemporary home designs perfectly. This material features a protective zinc coating that significantly increases rust resistance and extends the panel’s lifespan in variable weather conditions. Steel panels weigh more than aluminum alternatives but provide superior strength and weather resistance for porches exposed to harsh elements.
Available finishes include natural gray and various painted options, allowing you to select the perfect match for your home’s exterior style. The classic industrial appearance works particularly well with farmhouse, modern, and transitional architectural styles. We recommend galvanized steel for homeowners seeking a bold, contemporary look that stands up to demanding climate conditions.
Use Aluminum for Lighter Weight Options
Aluminum corrugated panels deliver the same visual appeal as steel while offering significantly easier handling and installation. Their lighter weight makes them perfect for porches with structural limitations or older homes where additional ceiling weight could pose concerns. These panels require minimal maintenance once installed and naturally resist rust without additional protective coatings.
Color options for aluminum panels are extensive, making it simple to coordinate with existing exterior elements like siding, trim, and shutters. Installation becomes much more manageable for DIY projects since the reduced weight eliminates the need for additional structural support in most cases. We find aluminum panels particularly suitable for homeowners prioritizing easy ceiling upgrades without compromising style or durability.
Paint to Match Your Home’s Color Scheme
Both galvanized steel and aluminum panels accept paint and powder coating treatments beautifully, enabling complete customization to match your home’s color palette. Painting can occur before installation for easier application or after mounting for precise touch-ups and color matching. This flexibility allows you to achieve a completely cohesive exterior appearance without sacrificing the practical benefits of metal panels.
Powder coating provides the most durable finish for long-term color retention and weather resistance. Standard exterior paints work well for budget-conscious projects, though we recommend choosing high-quality formulations designed for metal surfaces. The ability to customize colors means you can create seamless integration with existing architectural features while maintaining the cost-effective advantages of corrugated metal ceiling panels.


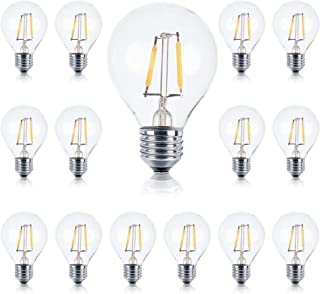
Add String Lights for Ambiance on a Budget
 9")
String lights offer one of the most affordable ways to transform your porch ceiling into a magical outdoor retreat. We can achieve stunning lighting effects without expensive electrical work or professional installation.
Use Battery-Operated LEDs for Easy Installation
Battery-operated LED string lights eliminate the need for complex wiring and expensive electrical upgrades. We recommend these lights because they install in minutes without requiring any electrical expertise or permits. Solar-powered options provide even greater convenience by automatically charging during the day and illuminating your porch each evening.
Modern battery-operated LEDs last 6-8 hours per charge and offer consistent brightness throughout their operation. We’ve found that rechargeable battery packs provide the most cost-effective solution over time. Many models include timers and remote controls, allowing us to customize lighting schedules without manual operation.
Hang in Patterns Across the Ceiling
Creating intentional patterns with string lights adds visual structure and maximizes the lighting impact across your porch ceiling. We suggest zigzag patterns that distribute light evenly while creating interesting geometric designs. Parallel lines running perpendicular to the porch length provide clean, modern aesthetics that complement contemporary home styles.
Crisscross patterns work particularly well for square or rectangular porches, creating diamond shapes that draw the eye upward. We recommend spacing lights 12-18 inches apart for optimal coverage without overwhelming the space. Using small cup hooks or adhesive clips allows us to achieve professional-looking installations that won’t damage ceiling materials.
Choose Warm White for Cozy Atmosphere
Warm white LEDs (2700K-3000K) create the most inviting and comfortable ambiance for outdoor porch spaces. We prefer this color temperature because it complements natural wood tones and enhances the relaxing atmosphere that porches should provide. Cool white lights tend to feel harsh and institutional in outdoor residential settings.
Warm white lighting promotes relaxation and encourages longer evening gatherings on the porch. We’ve observed that this color temperature flatters skin tones and creates appealing shadows that add depth to ceiling textures. Dimmable warm white options provide flexibility for different occasions, from quiet reading sessions to entertaining guests.


Conclusion
Transforming your porch ceiling doesn’t require a massive budget or professional installation. With these creative answers we’ve explored you can achieve stunning results that rival expensive custom work.
Whether you choose painted beadboard classic reclaimed wood or modern vinyl panels the key is selecting materials that match your home’s style and your maintenance preferences. These budget-friendly options prove that beautiful outdoor spaces are accessible to every homeowner.
We encourage you to start with one technique and build from there. Your porch ceiling can become the architectural focal point that ties your entire outdoor space together creating the welcoming atmosphere you’ve always wanted.
Frequently Asked Questions
What’s the most cost-effective way to transform a plain porch ceiling?
Painting is the most budget-friendly option for transforming porch ceilings. Use light colors like whites, creams, or pale grays to create an illusion of height and openness. Consider traditional “haint blue” for added Southern charm. Use specialized porch and floor paints for durability against moisture and UV damage.
How much does beadboard cost for porch ceiling installation?
Beadboard panels are an affordable classic solution available at most home improvement stores. PVC beadboard offers water resistance for durability, while MDF beadboard provides a budget-friendly option that requires proper sealing. Pre-made panels ensure uniform appearance and easy installation, making it a cost-effective DIY project.
Can I use reclaimed wood for my porch ceiling on a budget?
Yes, reclaimed wood planks add rustic appeal affordably. Source free wood from pallets or old barns for a budget-friendly option. Tongue and groove pine boards offer the appearance of expensive reclaimed wood while being lightweight and easy to install. Apply wood stain to enhance natural beauty.
How do I create a coffered ceiling look without hiring professionals?
Use basic lumber to frame rectangular sections that mimic traditional coffered panels. Add simple crown molding for definition and sophistication. Coordinate paint colors to unify the overall look and use outdoor-grade paint for weather resistance. This DIY approach achieves a high-end appearance at a fraction of professional costs.
What outdoor fabrics work best for porch ceiling treatments?
Use weather-resistant outdoor fabrics or canvas drop cloths for soft, textured focal points. Secure with heavy-duty staples or galvanized nails. Create visual interest with different colored sections using complementary colors and various textures. This approach provides sophisticated aesthetics without significant investment.
Is vinyl beadboard a good alternative to real wood?
Vinyl beadboard offers excellent low-maintenance benefits while mimicking real wood textures and grain patterns. It’s moisture-resistant, easy to clean, and suitable for humid porch environments. Available in various colors and finishes, vinyl allows customization to match existing exterior elements without premium lumber costs.
What textured paint techniques work for porch ceilings?
Sponge painting creates natural-looking textures, while rag rolling delivers vintage effects that mask imperfections. Stencils provide endless customization options for decorative patterns at minimal cost. These techniques add depth and visual interest affordably, transforming plain ceilings into attractive focal points.
How can I repurpose old materials for my porch ceiling?
Mount vintage shutters as ceiling panels for rustic charm and texture. Use salvaged doors to create unique ceiling treatments with architectural character. Sand and paint with exterior-grade paint for durability and aesthetic appeal. These repurposed materials create stunning features that rival expensive custom installations.
Are metal panels suitable for porch ceilings?
Corrugated metal panels offer budget-friendly durability for porch ceilings. Galvanized steel provides industrial aesthetics with rust resistance, while aluminum panels offer lighter weight for easier installation. Both materials can be painted or powder-coated for customization, matching your home’s exterior while withstanding harsh weather conditions.
How do string lights enhance porch ceiling aesthetics?
Battery-operated LED string lights create ambiance without complex wiring. Hang lights in intentional patterns for maximum visual impact. Warm white LEDs provide cozy atmosphere, making porches more inviting. String lights are an affordable way to enhance overall porch aesthetics and extend outdoor living enjoyment.