
You’ll need HOA approval before building your patio, even with a building permit. Your HOA reviews aesthetics—materials, colors, setbacks from property lines—while permits handle safety and zoning. Skipping HOA approval risks monthly fines between $100 and $500, mandatory removal of your completed patio, and serious problems when selling or refinancing your home.
Most approvals take 30 to 60 days with complete documentation. You’ll need architectural drawings showing the patio’s exact placement, material samples so the board can see actual colors and textures, and renderings that display how your patio fits with your home and neighborhood. Getting this right upfront prevents costly mistakes later.
Many homeowners find that contractors handle approvals faster than tackling the process alone. Contractors know what HOAs typically want to see and can prepare documents properly the first time. If you choose to apply yourself, contact your HOA early and ask for their specific requirements before you start drawing anything up.
Does Your HOA Require Patio Approval? Key Criteria to Check

How to Know if Your HOA Requires Patio Approval
Start by pulling out your CC&Rs (Covenants, Conditions, and Restrictions) and your HOA’s architectural guidelines. These documents contain the actual rules for your community. Look through them carefully for sections about exterior changes and whether patios need approval. Many HOAs flag visible features as requiring review, especially when those features affect how the neighborhood looks from the street.
Your CC&Rs and architectural guidelines contain the actual rules—review them carefully for exterior change requirements and patio approval policies.
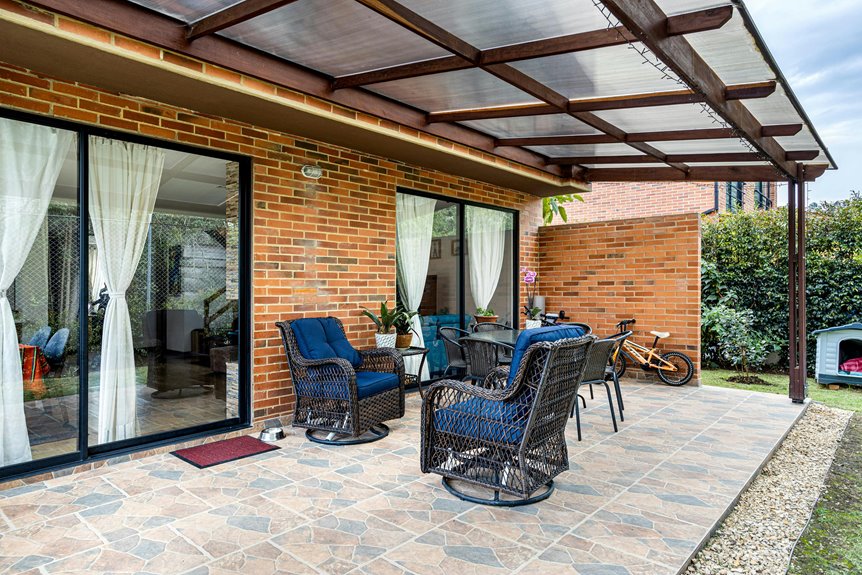
Pay attention to specific details your HOA cares about. Your patio’s size matters—a 8-by-10-foot structure might be treated differently than a 20-by-16-foot one. Materials count too. Some communities allow wood decks but restrict concrete pads, or vice versa. Where you place the patio on your lot also plays a role. A patio in your backyard might pass without approval while one visible from the road requires formal submission.
Many HOAs exempt small, freestanding structures under a certain height—often around 30 inches—from the review process. Others require written approval for any exterior addition, regardless of size. The rules differ widely from one community to another.
When the guidelines feel unclear or contradict each other, contact your HOA board directly. Ask a specific question: does a patio measuring 15 feet by 12 feet made of pavers in your backyard need formal approval. The board will give you a straightforward answer and explain what submission steps you’ll need to follow. Getting this confirmed in writing prevents future problems. You might receive approval in one to three weeks, or your HOA might ask for detailed plans showing placement, materials, and dimensions. Starting this conversation early saves you from building something that violates community rules and facing fines later.
What HOAs Actually Evaluate in Patio Covers

When you submit your patio cover plans, what’s actually on the HOA reviewer’s checklist?
Your HOA approval depends on several key evaluations during the review process. They’re protecting your neighborhood’s overall look and property values. Here’s what matters:
- Materials and colors – Your selections must match neighborhood standards and existing homes. If your neighbors have cedar shake roofs and stone accents, your cover should work with those materials, not against them.
- Architectural guidelines – The design needs compatible scale, height, and style with adjacent structures. Most HOAs have specific rules about how tall a cover can be—often 10 to 12 feet maximum—and whether it should match your home’s existing architectural style.
- Setbacks and lot lines – Placement must comply with community rules and legal boundaries. This typically means keeping your cover at least 5 to 10 feet from property lines, depending on local codes.
- Visual impact – How your outdoor structure affects curb appeal and neighborhood character from the street view.
You’ll need to provide architectural drawings, material samples like paint chips or wood stain cards, and color swatches. Some HOAs also require you to notify neighbors within a certain distance—sometimes up to 50 feet away—before your application moves forward. This thorough evaluation helps your patio cover fit well with community standards rather than standing out awkwardly.
Permits vs. HOA Approval: Which Comes First

Now that you understand what HOAs scrutinize, you’re probably wondering about another layer: building permits. Here’s the reality: you need both, but the submission order matters.
Some communities require HOA approval first. You’ll submit your architectural review request, get neighborhood sign-off, then apply for permits from your local building department. This sequence prevents wasted effort if the HOA rejects your design. Other areas allow simultaneous submissions, saving you time on your timeline. Check your local regulations before proceeding.
The permits address safety and zoning compliance. The HOA approval handles aesthetics and property values. Neither process replaces the other. Skipping either one invites serious consequences—fines, stop-work orders, or mandatory removal. Contact your HOA and building department today to clarify the correct submission order for your specific situation.
Why Skipping HOA Approval Costs More Than Getting It

Though it’s tempting to skip the HOA approval process and start building right away, you’ll almost certainly pay more in the long run. Getting an approved project status upfront protects both your wallet and your community standing.
What happens when you build without HOA approval:
- Fines accumulate quickly. Many HOAs impose monthly penalties ranging from $100 to $500 or more until you comply with their standards. These fees continue month after month, adding thousands of dollars to your costs within just a few seasons.
- Removal of structure becomes mandatory. If your building doesn’t meet HOA requirements, you may need to tear it down entirely. This demolition costs far more than the original construction would have.
- Building permit issues arise. Without HOA approval, inspectors may refuse to sign off on your project. Your homeowner’s insurance might also deny coverage if the structure violates community rules.
- Property values drop. Unapproved structures can lower your home’s resale value. When you eventually want to sell, buyers see the violation and lose interest.
Beyond these direct costs, you’ll face rework expenses and legal fees if disputes escalate. You’ll also deal with strained relationships with neighbors who see your project as breaking community rules.
The approval process typically takes 2 to 4 weeks. During that time, you’ll submit plans, answer questions, and make minor adjustments if needed. This upfront effort prevents expensive problems down the road. Following proper channels first means you build with confidence and avoid the financial and social damage that unapproved projects create.
Your HOA Submission Checklist: Plans, Samples, Renderings

When you submit your patio proposal to the HOA, you’ll need to gather three main types of documentation. Architectural drawings show exact dimensions and placement. Material samples display the colors and textures you’re planning to use. Renderings illustrate how your patio will look next to your home and neighboring properties.
Think of these materials as your case for why your project fits with the neighborhood. The drawings prove it’s properly positioned. The samples confirm it matches the community style. The renderings help reviewers visualize the final result.
Pulling together a complete package upfront saves you from multiple resubmissions and rejection cycles. These delays could push back your build timeline by weeks or months. Start by measuring your patio space to the nearest inch. Document the exact distance from your property line to where the patio will begin. Note any setback requirements your HOA specifies—many require a minimum of 5 to 10 feet from neighboring property lines.
Gather actual material samples rather than photographs or color printouts. Bring home samples of pavers, stone, or decking materials so reviewers can see how they look in natural light and against your home’s exterior. Include paint chips or stain samples if your patio will have a built-in seating area or pergola. The more specific your materials are, the less room there is for the HOA to request changes after approval.
For renderings, you have options depending on your budget and comfort level. A basic rendering might be a simple scaled drawing showing your patio’s footprint overlaid on an aerial photo of your property. More detailed renderings show a three-dimensional view of the finished patio from the perspective of your backyard or from your neighbor’s vantage point. Some homeowners hire designers to create these visuals, while others use free online tools or smartphone apps that allow you to photograph your yard and add design elements digitally.
Essential Documentation Packages
Your HOA submittal package determines whether your patio approval moves forward smoothly or comes back with requests for changes. A complete package shows you’ve prepared carefully and understand what the community needs to review your project fairly.
What to Include
Architectural drawings form the foundation of your submission. These should show exact dimensions of your patio, where it will sit on your property, and how it connects with your house and other structures. The HOA needs to see these details clearly.
A site plan displays your entire property layout and marks where the patio goes in relation to your property lines and your neighbors’ properties. This drawing helps reviewers understand the patio’s location at a glance.
Material specifications and color samples prove that your choices match what your community allows. If your HOA has guidelines about wood stain colors or concrete finishes, include samples that show you’ve selected within those parameters. Bring actual swatches or small samples, not just photos.
Photos or renderings help reviewers picture how your finished patio will look in context. If you’re working with a contractor or designer, ask them to create a rendering showing your patio in relation to your neighborhood. Even a few clear photos of similar completed projects can work.
Don’t overlook the HOA approval application form itself or any required fees. Include a clear written description of your project with all measurements in feet and inches. Note the patio’s dimensions, materials, and timeline for completion.
This level of detail respects your community’s review process and prevents the back-and-forth that delays projects by weeks or months.
Material Samples And Colors
Gather paint chips, wood stain samples, and stone or paver samples for your HOA approval packet. These physical materials help reviewers see how your patio will look next to neighboring homes and whether your color choices fit with community guidelines.
Bring the actual samples to your submission meeting instead of relying only on photos. When committee members hold the materials in their hands, they can judge the texture, sheen finish, and how natural light plays across the surfaces you’ve chosen. A rendering or sketch showing your finished patio from the neighbor’s viewpoint adds weight to your application by showing realistic impact on the surrounding area. This kind of visual documentation shows you’ve thought carefully about how your project fits with the rest of the community.
Architectural Drawings And Renderings
Architectural Drawings And Renderings
Your HOA’s review committee won’t approve a patio based on ideas alone. They need to see detailed plans that show exactly what you’re building and where it sits on your property. Architectural drawings and renderings form the foundation of your HOA approval submission.
What to Include in Your Submission
Start with dimensional floor plans. These drawings should show your patio’s exact placement, overall size in square feet, and distance from all property lines, typically measured in feet. Most HOAs require setback distances of 5 to 10 feet from side and rear property lines, though your local guidelines may differ.
Elevation drawings come next. These show your patio’s height from ground level, the specific materials you’ll use (concrete, pavers, composite decking), and the colors you’ve selected. Elevation drawings also display how the patio appears from neighboring properties, which helps the committee understand sight lines and visual impact from adjacent yards.
Site photos serve as context. Take photos of your current landscape, the area where the patio will go, and the surrounding neighborhood. These images show the committee what exists before construction and help them visualize how your project fits with the setting.
Two-dimensional or three-dimensional renderings show the finished appearance from street-level perspectives. A 2D rendering might be a flat drawing showing the top-down view, while a 3D rendering shows depth and dimension. Many homeowners use design software or hire professionals to create these visuals. Include renderings that show the patio as seen from the street, neighboring yards, and your back door.
Why These Details Matter
Complete visual documentation demonstrates careful planning. The committee can see the full scope of your project without guessing or imagining possibilities. Clear drawings reduce questions during the review process and typically speed up approval timelines, which often take 2 to 4 weeks for straightforward projects.
HOA Approval Timeline: How Long Your Patio Cover Decision Takes

How long you’ll wait for an HOA decision on your patio cover depends mainly on how complex your project is and how organized your application package is. Most HOA approval timelines run 30 to 60 days, though submitting complete paperwork upfront can speed things up considerably.
| Phase | Timeline | Key Action |
|---|---|---|
| Plan Preparation | Weeks 1–2 | Finalize designs with architect |
| HOA Submission | Week 2 | Submit complete application package |
| Architectural Review | Weeks 3–6 | Committee evaluates your patio project |
Your architectural review committee works faster when you’ve included everything they need. Incomplete applications and design revisions create delays that can extend your timeline by several weeks or longer. Some HOAs let you submit permit requests at the same time as your HOA application, while others require HOA approval before you can move forward with permits. Once you receive approval, construction typically starts within a few weeks.
The difference between a 30-day approval and a 60-day approval often comes down to preparation. When you submit your application with complete specifications—including exact dimensions like a 12-by-16-foot cover, material selections, and architectural drawings—the committee can review everything in one pass. Missing details like setback measurements or color samples mean the committee sends your application back, adding 1 to 2 weeks while you gather what they asked for.
When HOAs Say No: Appeals, Redesigns, and Variances

If your HOA denies your patio plans, you need to understand their specific reasons before moving forward. Once you know why they rejected your proposal, you can choose between two paths: redesign your project to match their guidelines, or request a variance to keep your original design.
A redesign means changing your plans to fit HOA rules. You might adjust the patio size from 20 feet by 16 feet down to 16 feet by 12 feet, swap materials from colored concrete to natural stone, or reposition the patio farther from your property line. This route works well when their concerns are straightforward—maybe they want better drainage or more distance from a neighbor’s window.
A variance is different. You ask the HOA for permission to break the standard rules while keeping your original design. A variance makes sense when you have solid reasons for your specific plan. For example, if your yard slopes at a steep angle, you might request a variance to build a retaining wall that’s six inches taller than allowed, since that height is necessary for stability on your terrain.
Both options take real time. Most redesigns take four to eight weeks from submission to approval. Variances usually take six to twelve weeks because the HOA board needs to review your justification and often holds a hearing where you can explain your position. Plan accordingly if you have a specific timeline in mind, like finishing before winter weather arrives.
Start by requesting written feedback from the HOA about their concerns. Then decide: can you modify your original idea reasonably, or is your design too important to change. That choice determines which path makes the most practical sense for your situation.
Understanding Denial Reasons
Why HOAs Reject Patio Plans
Understanding denial reasons helps you navigate the appeals process and avoid costly mistakes.
Your HOA may deny your patio proposal for several key reasons:
Architectural Guidelines Violations
Your materials, colors, or scale might clash with neighboring structures. If your neighbors have brick patios with neutral tones and you propose bright blue pavers, the HOA will likely flag this mismatch. They’re protecting a consistent look across the community.
Setback Non-Compliance
Patios must maintain specific distances from your property lines. Most HOAs require at least 5 to 10 feet from the rear property line, depending on local zoning laws. If your patio encroaches on an easement—a designated area where utilities or emergency services need access—the HOA cannot approve it.
Sightline and Access Issues
Your design might block views from common areas or obstruct pathways residents use regularly. A patio extending too far into a sight triangle (the area where drivers need clear visibility at intersections) creates safety problems.
Landscaping Changes
Removing trees or adding vegetation without approval affects the community’s overall look. The HOA considers how plantings impact neighboring properties and common spaces.
When rejection happens, you’ll receive written explanation detailing specific violations. This feedback guides your resubmission strategy. Don’t ignore these concerns because they reflect community standards that protect everyone’s property values. With updated drawings, color samples, and revised setbacks showing compliance with distance requirements, you strengthen your case significantly. Knowing exactly why they said no lets you address their specific objections in your next submission.
Redesign And Variance Options
Getting rejected on your patio application doesn’t stop you from building one. You have two main paths forward: redesign your plans or request a variance from HOA rules.
Redesigning Your Patio
Start by reviewing the rejection letter carefully. It will tell you exactly what didn’t meet guidelines. Common issues include setback distances from property lines, material choices that clash with neighborhood standards, or placement that blocks sight lines.
Work through these adjustments one at a time:
| Redesign Element | What to Change |
|---|---|
| Reduce dimensions | Make your patio 2-3 feet smaller in width or length to meet setback rules |
| Change materials | Swap composite decking for the same wood tone as neighboring patios, or use pavers that match existing driveways |
| Adjust placement | Move the patio 4-5 feet away from the street or corner lot lines |
A professional designer who knows your HOA’s specific standards can help significantly. They’ve seen what gets approved in your community and can adjust plans accordingly. If you hire one, budget 6-8 weeks for design revision and resubmission.
Requesting a Variance
A variance asks the HOA to make an exception to their rules. This works best when your property has unusual conditions—a steep slope, odd lot shape, or existing structures that limit placement options.
Variance requests need extra paperwork. You’ll submit site photos, measurements, and a written explanation of why standard rules don’t apply to your situation. This process typically takes 4-6 weeks longer than a standard review.
Neither path guarantees approval, but both show you’re willing to work within community standards while still pursuing your project.
Why Patio Cover Contractors Get Faster HOA Approvals

Why Patio Cover Contractors Get Faster HOA Approvals
Professional patio contractors speed up HOA approval because they’ve completed dozens of projects before. They know what your specific HOA committee expects to see, and they submit everything together rather than in pieces. This saves you weeks of waiting.
How contractors move projects faster through approval:
- Complete packages arrive at once – Engineer-stamped plans, material samples, and exact color specifications come together in a single submission. This prevents the back-and-forth where the committee asks for one missing piece, you gather it, and they ask for another. With everything present, reviewers can make their decision without delays.
- They understand your community’s specific rules – A contractor who has worked in your neighborhood before knows if your HOA prefers aluminum covers over wood, or if they want certain roof pitches at specific angles like 4:12 slope instead of 6:12. They design projects that match these preferences from the beginning, which means fewer revision requests.
- They talk to your architectural committee before submitting – Many contractors contact the HOA’s design reviewer informally before the formal application goes in. This conversation catches problems early. For example, if the committee might reject a cover that extends 15 feet from your house, the contractor learns this before drawing up final plans rather than after weeks of review.
- They coordinate your timeline with city permits – While your HOA reviews plans, contractors also handle city building permits. They schedule these processes to overlap, so you’re not waiting for HOA approval to finish before starting the permit process. A project that might take four months gets compressed into six to eight weeks this way.
When you work with someone familiar with your HOA’s process, what often takes three to four months moves along in four to six weeks.
What Happens If You Build Without HOA Sign-Off

Skipping the approval process might seem like a shortcut, but it’ll cost you far more later. Building without HOA approval brings serious consequences that hit both your finances and your home’s value.
Building without HOA approval might seem quick, but the financial and property value consequences will cost you far more later.
Your HOA can fine you, sometimes starting at $50 to $200 per day depending on your community’s rules. Beyond fines, the association has the power to demand removal of your entire structure. This means tearing down a deck, shed, or addition you’ve already built and paid for. You’re looking at double the expense—construction costs plus demolition.
When you sell your home, buyers will discover unapproved work during inspections. Many will walk away from the deal rather than risk complications. If you try to refinance your mortgage, lenders will flag the issue. Banks won’t lend against a property with unpermitted work, leaving you stuck.
The HOA inspects after construction ends. If they find work done without approval, they’ll require changes at your cost. These corrections take time and money. A roof replacement done without sign-off might need redoing to match community standards. A fence built 6 inches over the property line gets ordered removed.
Get HOA approval before you start building anything. Review your community’s architectural guidelines, submit plans with measurements and materials, and wait for written approval. This takes a few weeks but protects your investment and keeps your standing solid with neighbors.