
For a standard 6-foot fence, bury posts 2 to 3 feet deep. This follows the one-third rule—roughly one-third of your above-ground height goes underground.
What most people miss is how much your specific location matters. Your frost line depth, soil type, and wind exposure in your area change everything about how deep you need to dig.
Sandy soil requires deeper holes than clay soil does. If you live in a frost-prone region, bury posts 6 inches below your area’s frost line. This step prevents frost heave, where frozen ground pushes posts upward and tilts your fence. Wind stress works the same way—posts set too shallow will shift sideways within a year or two.
The depth range you’re actually working with depends on where you live. You might dig 2 feet in mild climates with stable soil. In harsh winters with sandy ground, you could be digging toward 4 feet. Call your local building department or county extension office to find your frost line depth and get soil information specific to your property. This five-minute phone call saves you from rebuilding your fence in a few years.
How Shallow Posts Fail: The Stability Consequence

Why Shallow Posts Fail: The Stability Consequence
Why do some fences lean or collapse after just a few years while others stand strong for decades. The answer lies in post depth.
When you bury posts only 1 to 1.5 feet deep for a 6-foot fence, you’re creating problems from the start. Shallow installations don’t have enough soil friction to hold against wind or ground movement. Think of it like trying to stand on a balance beam with only your toes touching it—you won’t stay upright for long.
In frost-prone regions, frost heave becomes a real problem. When soil freezes in winter, it expands and pushes posts upward, misaligning your entire fence section by section. Meanwhile, poor soil drainage accelerates wood rot around those shallow posts, weakening them from below. Dense clay soils make matters worse because they offer less resistance to the forces trying to lift your posts out of the ground.
Your post stability depends on adequate burial depth. For a standard 6-foot fence, you should bury posts at least 2 to 3 feet deep, depending on your soil type and climate. Skipping this step means watching your fence deteriorate over time instead of having a structure that works properly for years.
Calculate Burial Depth Using the One-Third Rule

The Basic Formula
The one-third rule gives you a straightforward way to figure out how deep to dig. For a 6-foot fence post, bury about 2 feet underground. An 8-foot post needs roughly 2.5 to 3 feet of burial depth. This simple calculation works because it balances the weight between what sits underground and what stands above ground, keeping your fence stable and upright.
When to Adjust Your Measurements
Your specific location and soil conditions matter more than the basic formula alone. Soft soil—like sandy or clay-heavy ground—requires deeper holes than the one-third rule suggests. Check your local frost depth, which is how far down the ground freezes in winter. If frost heave is common in your area, you may need to dig deeper to prevent posts from shifting upward as soil freezes and thaws. Wind exposure also plays a role. Posts in windy locations need extra depth for stability.
Adding Concrete for Extra Support
Start with your one-third measurement, then add gravel and concrete around the post base. Pour gravel into the hole first—about 4 to 6 inches helps with drainage. Mix your concrete according to package directions and fill the remaining space around the post. This layered approach keeps posts standing straight for years without settling or tilting.
Frost Line Depth: The Hidden Constraint on Your Hole

When winter arrives and soil freezes solid, water trapped underground expands, pushing your fence posts upward in a damaging process called frost heave. You need to dig below your region’s frost line—the depth where soil consistently freezes—to anchor posts safely against this seasonal ground movement.
Frost line depth varies significantly by location. A post buried shallow in Minnesota might shift 3 to 4 inches upward in a single winter, while the same post in Georgia might experience only minor movement. This difference comes down to how deep the ground actually freezes in your area.
Start by contacting your local building code office or checking their website for your region’s frost line depth. They’ll give you a specific measurement based on years of soil data collected in your county or municipality. Once you have that number, add 6 inches to it and dig your posthole to that final depth. If your frost line is 36 inches deep, for example, you’d dig down 42 inches.
The extra 6 inches below the frost line keeps your posts anchored even as ice crystals form and expand in the soil above. Set your posts in concrete, which bonds to the wood and resists the upward pressure that frost heave creates. After pouring concrete around a post, wait at least 24 hours before applying stress to it—the concrete needs that time to harden properly.
Understanding Seasonal Ground Freezing
Beneath your feet lies something that will determine whether your fence posts stay put or shift with the seasons. It’s called the frost line, and it’s where soil stops freezing in winter.
When cold weather arrives, water in the soil freezes and expands, pushing upward in a process called frost heave. This upward movement can lift your posts right out of the ground if you haven’t dug deep enough to anchor below this frozen zone.
The frost line depth varies dramatically depending on where you live. In Minnesota, it might be 48 inches deep. In Georgia, it could be just 12 inches. This difference exists because cold climates experience longer, more intense freezing periods than warmer regions do.
Your local building code office holds the answer to your specific frost line depth. These codes reflect your area’s seasonal ground freezing patterns and tell you exactly how far down you need to dig. Once you know your frost line depth, dig 6 additional inches below it. This extra depth provides a buffer against the upward pressure of frost heave and keeps your posts stable year after year.
Preventing Frost Heave Damage
Fence posts shift upward during winter because water in frozen soil expands. This movement, called frost heave, pushes your posts up and destabilizes your entire fence. The solution involves digging below the frost line—the depth where soil stays consistently frozen year-round.
Your local building codes specify the exact frost line depth for your area, so check those requirements before you dig. In regions with frequent frost, you’ll bury posts at least 6 inches below this line. The frost line might be 12 inches deep in mild climates or 48 inches deep in colder regions, so local information matters.
Different soil conditions affect how deep you need to go. Clay holds water differently than sandy soil, and that changes frost heave risk. Wet soils freeze harder and shift more than drier ones. When uncertainties arise about your specific soil type or local conditions, contact your building department or hire a professional to assess your site.
Once you’ve positioned posts at the proper depth, allow concrete to cure fully before seasonal freezes arrive. Most concrete needs 7 days to cure adequately, though waiting 14 days provides extra strength. Starting this work in early fall gives concrete time to harden before winter temperatures drop.
Getting the depth right keeps your fence stable through every freeze-thaw cycle that winter brings.
How Soil Type Changes Your Required Burial Depth

Your soil type determines how deep you need to dig your post holes. Different soils have different abilities to hold posts steady.
Sandy or loose soils don’t grip posts well. When soil particles are loose and shift easily, your posts won’t stay as stable. For a 6-foot fence in sandy soil, plan to bury your posts around 3 feet deep. After setting the post, pack gravel or concrete around it for extra support. The concrete creates a solid anchor that keeps the post from moving as the soil shifts over seasons.
Clay soil works differently. It naturally grips posts tightly because clay particles pack together. You might get away with burying your post only 2 feet deep in clay soil. However, you’ll still need to tamp the soil down firmly around the post. Tamping—pressing the soil down with a tool—prevents the soil from settling unevenly later on, which could tilt your fence.
The key difference is this: loose soils need depth and reinforcement, while clay soils need firm packing. Before you start digging, dig a small test hole to see what you’re working with. Feel the soil in your hands. Sandy soil crumbles and won’t hold its shape. Clay soil sticks together and feels sticky when wet. This simple test takes five minutes but saves you from guessing wrong.
Sandy Soil Requires Deeper Posts
When you’re digging into sandy or loose soil, you’ll quickly notice how differently it behaves compared to clay or packed earth. Sand shifts easily, and that movement affects how deep your fence posts need to go. Rather than following standard depth guidelines, you’ll want to bury 1/3 to 1/2 of your post underground to keep it stable.
Sandy soil presents a specific problem: poor drainage weakens the concrete footing around your post. Before you pour concrete, add a 4-6 inch layer of drainage gravel beneath where your post will sit. This gravel helps water flow away from the concrete instead of pooling around it. Once you’ve added the gravel, pack the soil firmly around the base so everything stays tight.
Because sand has weak shear strength, posts can wobble over time even with proper depth. Reincing your concrete with metal stakes or rebar helps prevent this movement. After you install your posts, plan to check them monthly during the first season. Sandy conditions shift with weather changes and use, so you’ll likely need to tighten bolts and inspect for settling as part of regular upkeep.
Clay-Heavy Soil Depth Adjustments
Clay soil presents real challenges for fence posts because of how densely packed it is. You’ll need to adjust your digging strategy to handle the specific problems clay creates.
Dig deeper for better stability. Clay soil won’t hold posts as securely as looser earth, so aim for the higher end of the one-third to one-half rule. If your fence post is 6 feet tall, you’d normally dig 2 to 3 feet down. With clay, push toward 3 feet or even deeper to get into more stable ground.
Handle water problems right away. Clay holds moisture like a sponge, which leads to rot around your post’s base. When you dig your hole, compact the soil around the edges as you backfill. Add 4 to 6 inches of gravel at the bottom of the hole to let water drain away from the wood instead of pooling there.
Go below the frost line. Freezing and thawing cycles push soil upward, a movement called heave. This shifting can lift your posts right out of the ground. Check your local frost line depth—it varies by region from 12 inches in warmer areas to 48 inches in colder climates. Dig at least 6 inches below that line.
Use concrete to prevent shifting. Wet clay expands and contracts with seasonal changes. A concrete foundation counteracts the pressure clay exerts on your post as it moves. Mix concrete into your backfill rather than relying on soil alone.
Make your hole diameter three times wider than your post width. A 4-inch-wide post needs at least a 12-inch-diameter hole. This wider base distributes weight better and gives concrete room to set properly in clay conditions.
Depth Changes for Taller Fences and Heavier Materials

When your fence gets taller or uses heavier materials like vinyl or composite, the hole needs to go deeper than the standard 2 to 2.5 feet. A 6-foot fence in typical conditions should go down at least 3 feet. That extra depth matters because wind and weight push harder on taller structures, and shallow posts won’t stand up to the stress.
Your soil type changes how deep you need to dig. Clay soil is stubborn—it shifts with freezing and thawing, so you’ll want to go 6 inches below your local frost line to stop the ground from heaving and pushing your post up. Loose soil or windy areas demand more: aim for 3.5 to 4 feet deep. Check your region’s frost line depth before you start digging, since it varies by location.
Concrete footings become important at these greater depths. The concrete locks your posts in place, stops them from shifting side to side, and keeps everything standing straight. Without it, your fence will lean or wobble over time. Mix and pour the concrete while the post sits in the hole, then let it cure for at least 24 hours before adding any weight or pressure to the fence.
Choose Between Concrete and Gravel Footings

When you’re installing fence posts, you’ll face a choice between concrete and gravel footings. Each option handles the job differently, so understanding what each does helps you pick the right one for your situation.
Concrete footings offer strong, stable support. They work best for taller fences or ones made from heavy materials. When you set posts in concrete, they stay locked in place. The concrete needs 24 to 48 hours to cure fully before you attach fence panels or boards to the posts. During that waiting period, the concrete hardens and reaches its full strength.
Gravel footings take a different approach. Instead of locking posts rigid, gravel lets water drain away from the base of your posts. Moisture that sits around wood causes rot over time, so letting it escape through gravel keeps your fence standing longer. Gravel works particularly well in areas where water pools or where rain is frequent.
Your choice comes down to what your fence needs. Taller fences over 6 feet tall benefit from concrete’s strength. Shorter fences in wet soil often do better with gravel’s drainage. Some people use both methods on the same fence, putting concrete on posts that carry more weight and gravel on lighter sections.
Concrete Stability Benefits
Concrete footings outperform gravel-only bases in one critical way: they keep your fence posts locked in place. You’ll notice the difference immediately when you choose concrete over gravel alone.
Reduces post movement. Concrete provides greater lateral stability than gravel, preventing shifting over seasons and years. Posts stay centered and secure, minimizing damage from settling below the frost line.
Extends fence lifespan. When posts remain stable, they experience less stress and wear. A fence with properly anchored posts can last decades longer than one built on gravel alone.
Requires proper curing. Before you attach panels to your posts, allow 24 to 48 hours for the concrete to cure fully. This waiting period matters because concrete continues hardening during this time, reaching maximum strength at whatever post depth you’ve chosen.
Needs drainage support. Layer 3 to 4 inches of gravel beneath your concrete. This step improves drainage and prevents water from pooling around the base of your posts, which stops wood rot at the ground line. Without this gravel layer, moisture gets trapped and slowly damages the wood.
When you dig deep enough and pour concrete properly, your fence becomes a permanent structure that stands firm through weather and time.
Gravel Drainage Advantages
Gravel Drainage Advantages
Why does gravel matter so much when you’re setting fence posts? Water pooling around your post base causes rot and shortens your fence’s lifespan. Gravel prevents this by creating a drainage layer that lets water move away from the wood naturally.
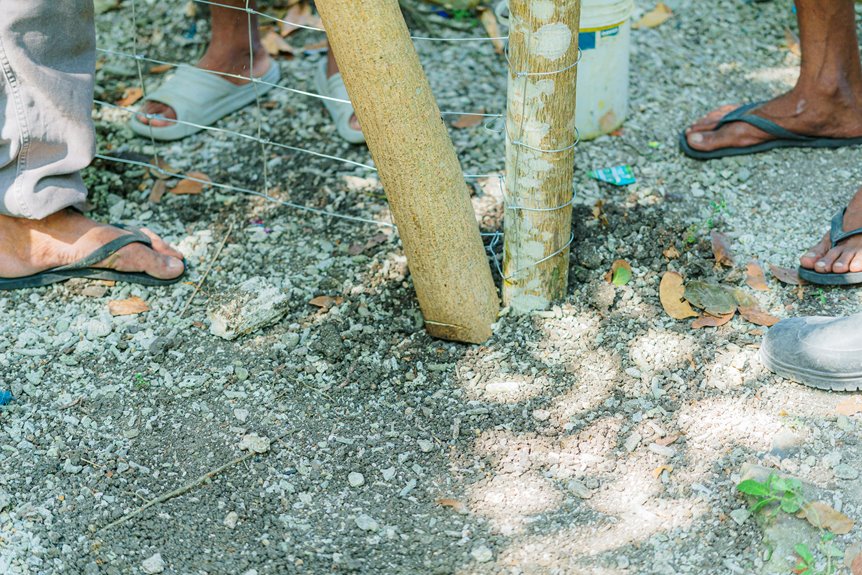
Here’s what to do. Dig your post hole at least 3 feet deep in most climates—this gets below the frost line where ground freezing and thawing can shift your posts. Add 3–4 inches of gravel at the bottom of your hole before doing anything else. This layer keeps moisture away from wood and protects your investment from the ground up.
If you’re using concrete with your posts, make your hole diameter three times wider than the post itself. Layer the gravel first, then add the concrete. This gives the water somewhere to go instead of sitting against your post. Let the concrete cure for 24–48 hours before you install any fence panels on top. The gravel-then-concrete approach gives you the durability you’re looking for without extra steps or materials.
Mark Post Locations and Prepare the Ground

Before you break ground, how you’ll lay out your fence has a huge impact. Proper planning prevents costly mistakes and helps your fence stand strong for years to come.
Start with these essential steps:
- Mark post locations using stakes and rope, creating straight, evenly spaced lines that guide your digging
- Call 811 for digging clearance to locate underground utilities before you dig
- Remove sod and vegetation from marked holes to prevent auger clogging and keep your digging clean
- Check your local frost line depth. In frost-prone areas, this typically sits at least 6 inches below ground
Once you know where your posts go, figure out your hole diameter. A hole at least three times wider than your post width gives you room for gravel, concrete, and proper backfill. This ground preparation work takes time upfront but saves you real headaches during installation. When you get this part right, the rest of the job goes more smoothly.
Drilling the Perfect Hole: Diameter, Depth, and Technique

Now that you’ve marked your post locations and cleared the ground, it’s time to dig. Make your drill hole diameter at least three times wider than your post width. This extra space gives you room for gravel drainage and concrete around the post, which keeps water from pooling at the base. Keep your drill perfectly vertical as you work—straight, plumb posts will stand stable for years.
Your fence post depth matters tremendously. Dig down one-third to one-half of your post’s above-ground height, making sure you go well below your local frost line depth. In many regions, the frost line sits 12 to 48 inches below the surface depending on your climate, so check your area before you start. Going deep enough prevents frost heave, which happens when frozen ground pushes posts upward in winter.
After drilling, add 3 to 4 inches of gravel at the bottom for drainage. This layer stops water from sitting under your post. Place your post in the center of the hole, checking that it stays vertical with a level tool. Pour concrete around the post next, filling the hole to ground level. Let the concrete harden completely—typically 24 to 48 hours—before you lean on the fence or attach rails.
| Key Measurement | Your Guideline |
|---|---|
| Hole Diameter | 3× post width |
| Gravel Base | 3–4 inches |
| Post Depth | 1/3–1/2 post height |
| Below Frost Line | Varies by region (check local depth) |
| Concrete Cure Time | 24–48 hours minimum |
Set Posts Level and Plumb While Concrete Cures

Keeping a fence post standing straight while concrete hardens takes patience and attention over 24 to 48 hours. This period determines whether your fence will stand plumb for decades or develop problems later.
Check and Adjust Early
Before pouring concrete, use a spirit level or plumb line to verify each post stands perfectly vertical. Check the post in two directions—front to back and side to side. Once you pour concrete around the base, making corrections becomes much harder, so get the angle right from the start.
Monitor During Backfilling
As you add soil or concrete around the post, check the plumb regularly. The weight of material can shift a post slightly, especially if you load one side more than the other. Make small adjustments immediately rather than waiting until the concrete fully sets. A post that’s off by even a quarter inch at ground level will be noticeably tilted at the top, where fence rails attach.
Understand Why This Matters
Your post sits below the frost line to prevent heaving—the upward movement that happens when frozen ground expands in winter and thaws in spring. A tilted post bears weight unevenly and won’t resist heaving as effectively as a plumb one. Posts that tilt tend to lean further over time.
Let Concrete Cure Completely
Follow the manufacturer’s instructions for cure time, which typically ranges from 24 to 48 hours depending on concrete type and temperature. Don’t attach rails or add stress to the post until curing finishes. Concrete continues to harden during this period, and disturbance can weaken the bond between post and concrete.
Standard Post Spacing: 8 to 25 Feet Depending on Fence Type

Understanding Post Spacing for Your Fence
Post spacing matters because it affects how well your fence stands up to weather and use over time. Different fence types call for different distances between posts.
Wood fences typically use 8-foot spacing. This distance balances the need for strength with reasonable costs. Wire fences can stretch much farther—up to 25 feet between posts—when the wire is pulled tight properly. High-tensile wire products like STAY-TUFF can work with even wider spacing, which means you’ll need fewer posts and spend less money while keeping the fence strong.
Your location’s soil type and frost line depth change how deep you bury posts, which in turn affects spacing choices. In areas with heavy snow, closer spacing adds extra stability to handle the weight. Once you pour concrete around your posts, wait 24 to 48 hours for it to harden before hanging rails or panels. After that time passes, your posts are ready to support the fence.
The spacing you pick depends on what kind of fence you’re building and what your weather and soil look like. Getting this part right from the start means your fence will last longer and perform better.
5 Fence Post Installation Mistakes That Cause Failure

Even small missteps during installation can undermine everything you’ve planned and measured. You’ll want to avoid these common pitfalls:
Even small missteps during installation can undermine everything you’ve planned and measured.
- Ignoring the frost line – In winter, ground freezes and expands. When you don’t dig below this frost line, your posts shift upward as the soil moves. This destabilizes your entire fence, sometimes by several inches over a single season.
- Digging insufficient post depth – Shallow holes won’t provide the anchor strength you need. Posts need to go deep into stable soil to resist wind pressure and weight. Most residential fences require 2 to 3 feet of depth, depending on your local climate and soil type.
- Skipping gravel drainage and using improper hole diameter – A hole too small prevents adequate concrete anchoring and weakens your structure. More importantly, without gravel at the base, water pools around posts year-round. Even with concrete around the post, trapped moisture causes rot from the inside out. Dig a hole three times wider than your post width and add 3 to 4 inches of gravel before pouring concrete.
- Getting the concrete amount wrong – Most residential posts need 6 to 8 inches of concrete above ground level to protect the wood and provide stability. Too little concrete leaves the post vulnerable to frost heave and movement.
Getting these details right matters. A properly installed fence with correct depth, drainage, hole diameter, and concrete thickness will serve you reliably for 15 to 20 years or more. Your post won’t shift, rot won’t develop, and your fence will stand straight through seasons of weather.
Gravel, Concrete, and Drainage: Stopping Wood Rot at the Base

Now that your hole is dug to the right depth and you’ve avoided common mistakes, it’s time to focus on what goes inside—because the foundation you build determines whether your fence lasts 20 years or falls apart in five.
Start by adding 3–4 inches of gravel at the bottom. This layer does one job: it lets water drain away from your post’s base. Without it, water pools around the wood and rot starts working its way in.
| Step | What to Do |
|---|---|
| Gravel Layer | Add 3–4 inches for drainage |
| Concrete Installation | Pour 6–8 inches around centered post |
| Curing Time | Wait 24 hours minimum before attaching panels |
Next, center your post in the hole and pour 6–8 inches of concrete around it. Use your level while you pour and while the concrete hardens. As the concrete sets, backfill the remaining space with dirt and tamp it down firmly to push out any air pockets. These air pockets trap moisture, which leads straight to rot.
The combination of gravel for drainage, concrete for stability, and tamped soil for support stops wood rot before it starts. The gravel keeps water moving away from the wood. The concrete keeps the post standing straight and stable. Together, they create the conditions where rot can’t take hold.
Know When to Hire a Professional for Help

Should you tackle this project yourself, or is it time to call in someone with experience? Consider hiring a professional if you encounter these situations:
- Your soil’s frost line runs deeper than expected — professionals know regional requirements and can dig to the correct depth for your area. In Minnesota, for example, the frost line can reach 42 inches deep, while in milder climates it might be only 12 inches. Getting this wrong means your posts could shift when the ground freezes and thaws.
- You’ve got challenging soil drainage — clay-heavy or waterlogged yards need expert assessment to prevent post rot. A professional can evaluate whether you need drainage pipes or gravel layers to keep water away from your concrete base.
- Post depth calculations feel overwhelming — contractors understand the one-third to one-half rule, meaning if your fence is 6 feet tall, you’ll need the post buried 2 to 3 feet underground. They handle these measurements correctly the first time.
- Concrete setting requires precision — professionals finish the job correctly, securing posts so they stay stable for years. This includes mixing concrete to the right consistency and waiting the full 24 to 48 hours for it to cure before adding weight to the fence.
Getting professional help isn’t admitting defeat. It’s investing in a fence that lasts. Experienced installers handle frost protection, drainage systems, and concrete work efficiently, saving you time and the expense of fixing mistakes later.