
Choosing the Right Wire Gauge for Landscape Lighting
Start by measuring two specific things: how far your transformer sits from the farthest light fixture, and the combined wattage of all the bulbs you’re running on that line.
For short runs under 50 feet with 30 watts or less, 16 AWG wire works fine. When you’re setting up a typical system that stretches to 100 feet with around 90 watts total, step up to 14 AWG. Once you go beyond 100 feet or add higher wattage bulbs, switch to 12 AWG instead. This thicker wire prevents voltage drop, which is what causes your lights to dim as the current travels farther from the transformer.
The reason wire gauge matters comes down to physics. Thinner wire resists electrical flow more strongly over distance, like trying to push water through a narrow hose. The longer the run, the more that resistance affects your lights. Thicker wire lets electricity flow more easily, keeping your bulbs at full brightness and reducing wasted energy that turns into heat instead of light.
Think of it like this: a short driveway with two small lights doesn’t need the same electrical pathway as a long property line with eight fixtures. The distance and total load you’re asking that wire to handle determine whether you can skimp on gauge or need something heavier.
Beyond selecting the right gauge, you’ll also want to think about how you’ll protect and bury this wire, though those details work separately from your gauge calculation.
Select the Right Landscape Wire Gauge by Run Length and Wattage

How to Pick the Right Wire Gauge for Your Landscape Lighting
Choosing the correct wire gauge comes down to two measurements: how far the wire travels and how much power your lights will draw. These two factors determine whether you need 12 AWG, 14 AWG, or 16 AWG wire.
Choosing wire gauge depends on two factors: how far the wire runs and how much power your lights draw.
Start by measuring your run length—the distance from your transformer to the farthest light. Then add up the wattage of all your bulbs. With these numbers, you can match them to the right gauge.
For a typical setup running 100 feet or less with about 90 watts of lighting, 14 AWG wire works well. If your run stretches beyond 100 feet or your total wattage climbs higher, move up to 12 AWG. The thinner 16 AWG works only for shorter distances, usually under 50 feet, with lights drawing 30 watts or less.
Think of wire gauge like a water pipe. A thin pipe can only handle so much flow before pressure drops. The same applies to electrical wire. When wire is too thin for the distance and power traveling through it, voltage drops along the way. This means your lights get dimmer the farther they sit from the transformer. Matching your wire size to your distance and load prevents this problem.
Use an AWG chart to double-check your choice before buying wire. Compare your specific run length and wattage against the chart’s recommendations. This simple step catches mistakes and saves you from running undersized wire that will cause problems later.
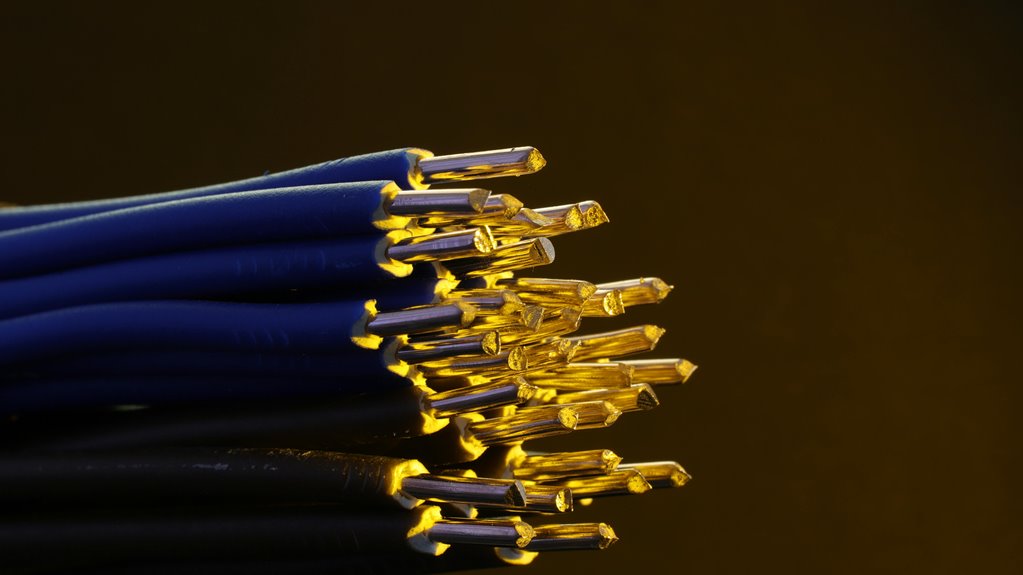
12/2 vs. 14/2 vs. 16/2: Which Wire Do You Need?

12/2 wire is the thickest option available, and it handles longer distances and higher wattage demands better than thinner wire. If you’re running lights more than 100 feet away or powering multiple fixtures, this is what you need. 16/2 wire works for short runs under 50 feet when you have minimal power needs—think a few small lights near your patio.
14/2 wire sits in the middle. It performs well up to about 100 feet and can handle roughly 90 watts of total power, making it the most versatile choice for typical landscape lighting. Most setups fall into this range.
Your actual decision depends on two things: measuring how far the wire needs to travel from your power source, and adding up the total wattage of all your lights. Once you know those numbers, match them to the right gauge. Picking the wrong wire size causes voltage drop, which dims your lights as power travels down the line.
Wire Gauge Performance Comparison
When you’re planning your landscape lighting system, picking the right wire gauge makes a real difference in how well your lights perform. You’ll find three main options available, each suited to different situations.
| Wire Type | Best For | Max Run | Max Wattage |
|---|---|---|---|
| 12/2 | Long runs, high power | 360 feet | 200 watts |
| 14/2 | Balanced use | 100 feet | 90 watts |
| 16/2 | Short runs, low power | Shorter | Lower loads |
Your choice depends on two basic questions: how far does your wire need to travel, and how much power will your lights actually use. Thicker wire like 12/2 handles longer distances better because it reduces voltage drop—that’s when power weakens as it travels through the wire. Thinner 16/2 works fine for compact areas with just a few lights.
Think of wire gauge this way: the farther electricity has to travel, the thicker your wire needs to be. If you’re running lights 360 feet across a large property, 12/2 wire delivers steady power to fixtures at the far end. For a small patio just 30 feet from your power source, 16/2 wire handles the job without problems.
Start by measuring the distance from your power source to your farthest light. Then add up the wattage of all the lights on that line. A 100-foot run with 80 watts of lighting calls for 14/2 wire. A 50-foot run with 60 watts works with 16/2. If your distances exceed 100 feet or you’re planning more than 90 watts of lights, step up to 12/2 wire to avoid dimming or flickering.
Selecting Based On Distance
Now that you understand how voltage drop affects your lights, it’s time to match that knowledge to the actual distances in your yard.
For shorter runs under 100 feet, 16/2 wire works well with lower wattage systems. It’s cost-effective and easier to install through tight spaces. If your run stretches beyond 100 feet or you’re powering multiple fixtures, switch to 14/2 instead. The heavier gauge handles longer distances without significant voltage loss.
Use 12/2 for runs exceeding 150 feet or when you’re powering close to 200 watts. The rule is straightforward: longer distances demand thicker wire, just as bigger loads do. Measure your actual pathway from transformer to furthest light. This single step helps your fixtures perform reliably throughout the season.
How Far Can 14 Gauge Landscape Wire Actually Run?
When you’re planning your landscape lighting layout, 14 AWG wire can safely run about 100 feet if you’re powering typical lighting loads up to 90 watts. Go beyond that distance or add more wattage, and voltage drop becomes a problem—your lights will get noticeably dimmer. The actual performance depends on two main factors: what you’re powering and how deep you’ve buried the wire. Both deeper installation and heavier loads reduce how far your wire can effectively carry power.
If your design needs longer runs or you want to connect multiple light fixtures on one circuit, you have two practical options. You can switch to 12 AWG wire, which handles longer distances better. Alternatively, you can install a secondary power feed closer to the distant section of your yard, which cuts down the wire run length and solves your voltage drop problem.
Maximum Distance Limitations
A 14 AWG landscape wire can safely carry about 90 watts of power for roughly 100 feet of wire run. Think of electricity moving through wire like water flowing through a garden hose. The thinner the hose, the more pressure drops as the water travels. Thin wire works the same way—power weakens as it travels longer distances.
What happens beyond 100 feet? Your lights dim noticeably. The system becomes less efficient because the electrical current loses strength along the wire. This problem is called voltage drop, and it’s not a failure of your setup—it’s just how electricity behaves.
The relationship between distance, power, and wire thickness matters most. Higher wattage demands either shorter wire runs or thicker gauge wire. If your landscape layout is longer than 100 feet, you have two practical options: use lower wattage fixtures, or upgrade to thicker wire like 12 AWG. Upgrading the wire gauge significantly extends how far you can run power while keeping your lights at full brightness.
To find the right wire gauge for your specific setup, use a wire selector chart. Match your planned wattage and total distance to the chart. The chart will tell you exactly which gauge wire to buy. This straightforward step prevents voltage drop problems before they start.
Wattage Capacity Guidelines
14 AWG wire can handle up to 90 watts over distances of 100 feet or less. The key is matching your total wattage to how far the wire needs to travel.
Power and distance work against each other. When you run wire longer distances, voltage drops along the way. This voltage loss dims your lights, even though they’re receiving power. A 50-watt setup gives you more flexibility with length than a 90-watt system does.
Here’s how to approach this: Start by calculating your project’s total wattage. Add up all the lights you plan to install. Then measure the distance from your power source to the farthest fixture. Check the manufacturer’s wattage chart for your specific wire and distance combination. These charts show exactly what wattage works at each distance—you’re not estimating, you’re following tested data.
If your project requires a longer run than 100 feet, you’ll need to either reduce wattage or step up to thicker wire like 12 AWG. Taking time to match your wattage to your distance prevents dimming problems and keeps your lighting system working reliably.
Performance At Extended Lengths
How far can 14 AWG wire really go?
14 AWG wire works best around 100 feet when you’re powering about 90 watts. Beyond that distance, voltage drop starts pulling power away from your lights, and they’ll begin to dim noticeably. The farther the electricity has to travel through the wire, the more energy gets lost along the way.
What limits your wire’s reach
Three factors work together to determine how far your 14 AWG can stretch:
- Run length matched with wattage: A 50-foot run can handle higher wattage without problems. A 150-foot run needs much lower wattage to avoid dimming.
- Voltage drop over distance: Electricity weakens as it moves through longer wires. Thicker wire (like 12 AWG) or higher-voltage systems fight back against this loss.
- Conduit protection: Running your wire through conduit keeps it safe from damage and wear, so you won’t need to replace it down the road.
When to upgrade
If your installation will be at or near 100 feet, 14 AWG is adequate. Once you exceed 100 feet, switch to 12 AWG wire. Alternatively, consider a higher-voltage system to keep brightness consistent across longer distances. The cost difference between wire gauges is modest compared to dealing with dim lighting later.
Should You Bury Landscape Wire or Use Conduit?

When you’re installing landscape lighting, you’ve got two main paths: bury the wire directly in the ground or run it through protective conduit.
Direct Burial
Burying wire saves money upfront and keeps things hidden from view. You won’t see cables snaking across your yard. However, digging creates work, and over time you’ll face real problems. Shovels and tillers can slice through wire during yard work. Tree roots grow into the soil and damage cable insulation. After about 5 to 7 years, most directly buried wire starts failing.
Conduit Protection
Running wire through plastic or metal conduit costs more at the start. A 50-foot roll of landscape wire costs around $20 to $30, while protective conduit runs $40 to $60 for the same length. The extra expense pays off because conduit blocks sun exposure, keeps moisture away, and protects against tool damage. Wire protected this way lasts 10 years or longer.
Where Each Method Works Best
Think about how your yard gets used. Areas where you dig frequently, mow, or plant seasonally need conduit protection. Quiet corners under established trees or along fence lines work fine buried. You might also run wire under an awning or patio overhang for 8 to 10 years of life without full conduit costs.
The location you choose for your wiring affects how long your lighting system actually works. Protecting wire from direct sunlight matters regardless of your method.
Minimum Burial Depth: What Code Requires and Why

Once you’ve decided to bury your landscape wire directly in the ground, you’ll need to know exactly how deep to dig. The National Electrical Code (NEC 300.5) sets specific burial depth requirements. These standards exist because cables left too close to the surface get damaged from foot traffic, shovels, and weather.
Your minimum burial depth depends on where you’re installing the wire.
Standard landscape areas require 6 inches of depth for typical garden and lawn installations. This protects against someone accidentally stepping on the wire or a shallow shovel strike.
High-traffic zones need 24 inches of depth under streets, driveways, and parking lots. The extra depth prevents damage from vehicle weight and heavy machinery that contractors might use in these areas.
Dwelling-related areas require 18 inches of depth in specified residential zones. This middle depth works for areas where digging might happen occasionally but not daily.
Burying your wire at these depths means it stays protected from accidental damage and weather exposure. The deeper your cable sits, the longer it will last. Before you start digging anywhere, check with your local electrical inspector or utility office. Requirements vary by region, and some areas have stricter rules based on soil type or flooding risk.
Find Your Landscape Wire Size With an AI-Powered Selector

How to Pick the Right Wire Size for Landscape Lighting
Choosing the correct wire gauge for outdoor lighting can feel confusing. An AI-powered selector removes that confusion by asking just two questions: how far your wire needs to run and how many watts your system uses.
Choosing wire gauge for outdoor lighting is confusing—until an AI selector asks just two simple questions about distance and wattage.
You input your run length and total wattage into the tool. The system then points you toward the right gauge—typically 12, 14, or 16 AWG. For most home projects, this covers distances up to 360 feet and power requirements up to 200 watts. Standard landscape wire comes in versions like 12/2, 14/2, or 16/2, and the selector helps match your needs to these common options.
To use this tool, you’ll need a free ChatGPT account. Once you have access, you simply provide your two key details. The AI weighs factors like voltage drop—the gradual loss of power as electricity travels through wire—and recommends which gauge prevents your lights from dimming too much. This beats guessing or buying wire that doesn’t fit your actual setup.
The biggest advantage is buying exactly what you need. If you’re running 150 watts across 200 feet, you get a different recommendation than someone running 80 watts across 100 feet. Matching wire size to your specific numbers means your lights stay bright and your installation works properly.
Installation Mistakes That Void Warranty and Damage Systems

Most landscape lighting warranties become invalid the moment you skip proper installation steps—and that’s often where homeowners run into trouble.
Protect your investment by avoiding these common mistakes:
Burying wire without conduit protection. Direct burial wire needs extra defense against shovels, lawn mowers, and weather damage, especially in high-traffic zones. Think of conduit as a protective sleeve that keeps your wires safe underground. Without it, one careless dig during spring cleanup can crack the insulation and create a short circuit that kills your whole system.
Installing at incorrect depths. This is where most people slip up. Driveways require 24 inches of burial depth; dwelling zones need 18 inches. Shallow burial exposes your system to damage and code violations. If you only dig down 12 inches under a driveway, freezing temperatures will crack the wire casing, and vehicle weight will eventually crush it.
Using the wrong wire gauge for your run length. A 14 AWG wire works fine for a 50-foot run, but stretch it to 150 feet and you’ll get voltage drop that dims your lights noticeably. The longer the distance, the thicker the wire needs to be. A 10 AWG wire costs more upfront but delivers the power your system actually needs across that distance.
Installation quality matters because manufacturers know proper technique prevents failures. Taking time upfront—a few extra hours with the right materials—saves you from warranty disputes and expensive repairs later on.